
A lot of progress has been made in the last few months on my version of the 1960’s classic Mold-a-Rama machine.
The design has been further refined
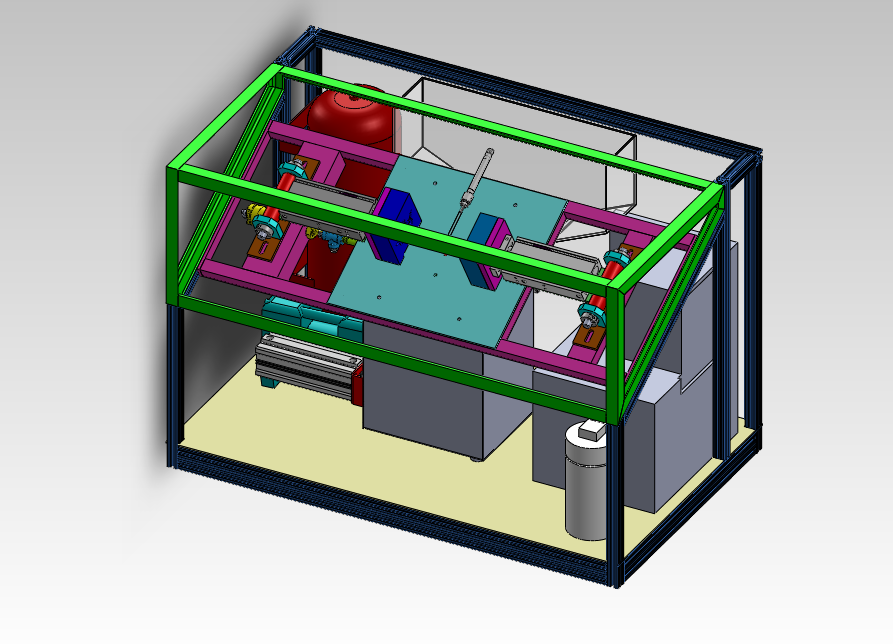
- The frame where the mold cylinders attach has been changed from 80/20 to 1″ square aluminum tubing.
- This change was made because I was having a hard time mounting and aligning the various components to the slots in the aluminum extrusion.
- The mold halves will press against each other with several hundred pounds of force; the friction fit nature of t-slot construction would likely have failed under this load. The new frame is a one piece welded structure.
- The new frame, while not re-configurable, will be much stronger and allow for easier alignment of the plastic tank and mold halves.
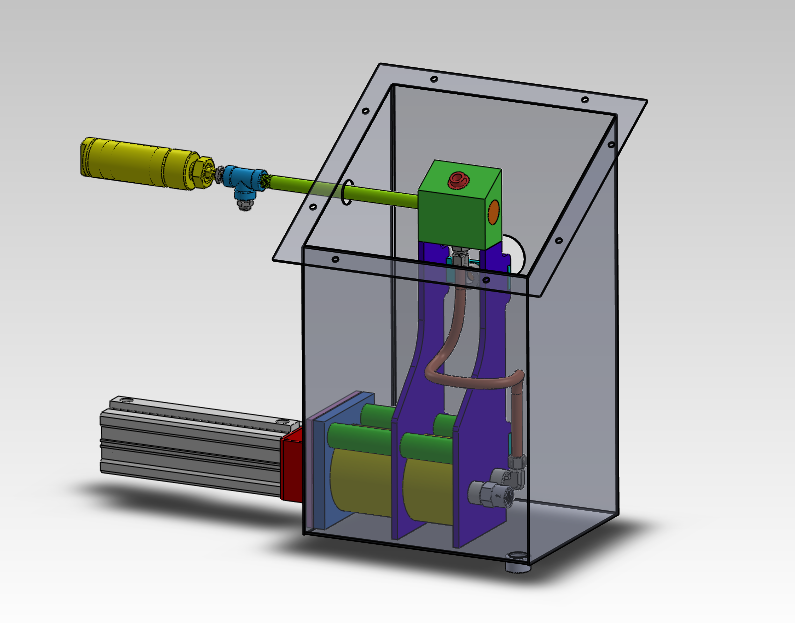
- The plastic pump has been completely redesigned
- I’ve switched from a right angle gear motor to an air cylinder driven piston pump (think giant aluminum syringe)
- This change eliminated a complex machined part ($$$) and replaced it with a much simpler welded tube and plate design ($)
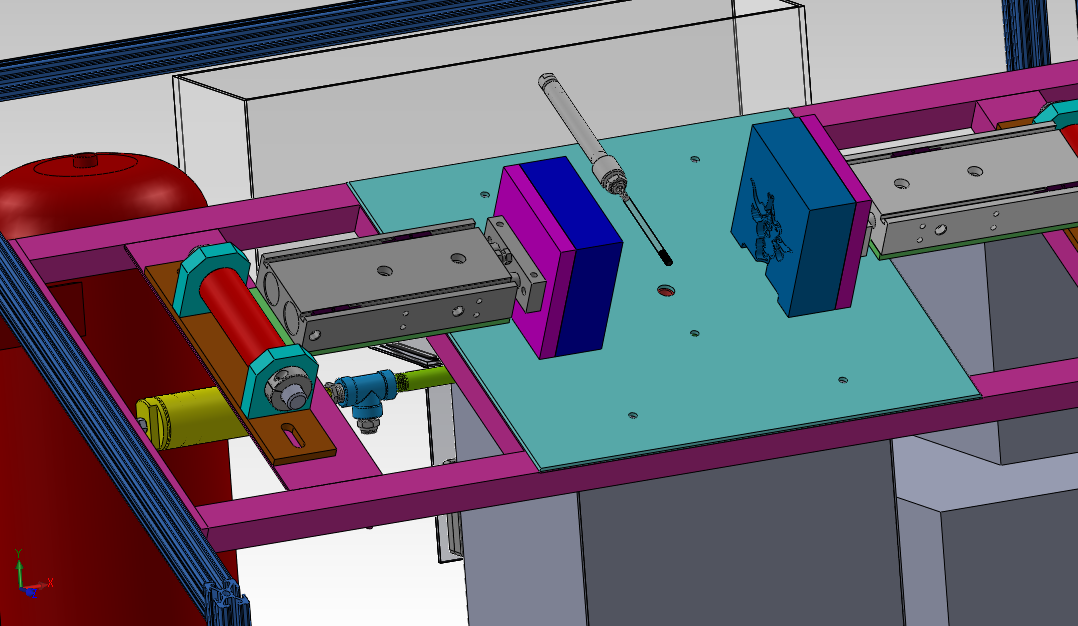
- The actual mold cylinders have been selected
- So much of the design decisions and components selections have been driven by what I can get on the surplus market Case in point: the mold cylinders. I’ve seen that the actual mold-a-ramas have an enormous amount of play in their mold cylinders and mounts. I thought using a twin piston cylinder would help with the side loading on the pistons (due to the weight of the molds want to slide down on the angled frame. I found a good price for two twin piston SMC cylinder on eBay (with sensors and flow control fittings!)
- I designed a robust mounting system using aluminum tube, bronze bearings, and 5/8″ steel shafting.
Parts have been bought
I’ve also been spending quality time on eBay, at surplus stores, and throwing money at various other online retailers. Here’s where some of the money has gone:
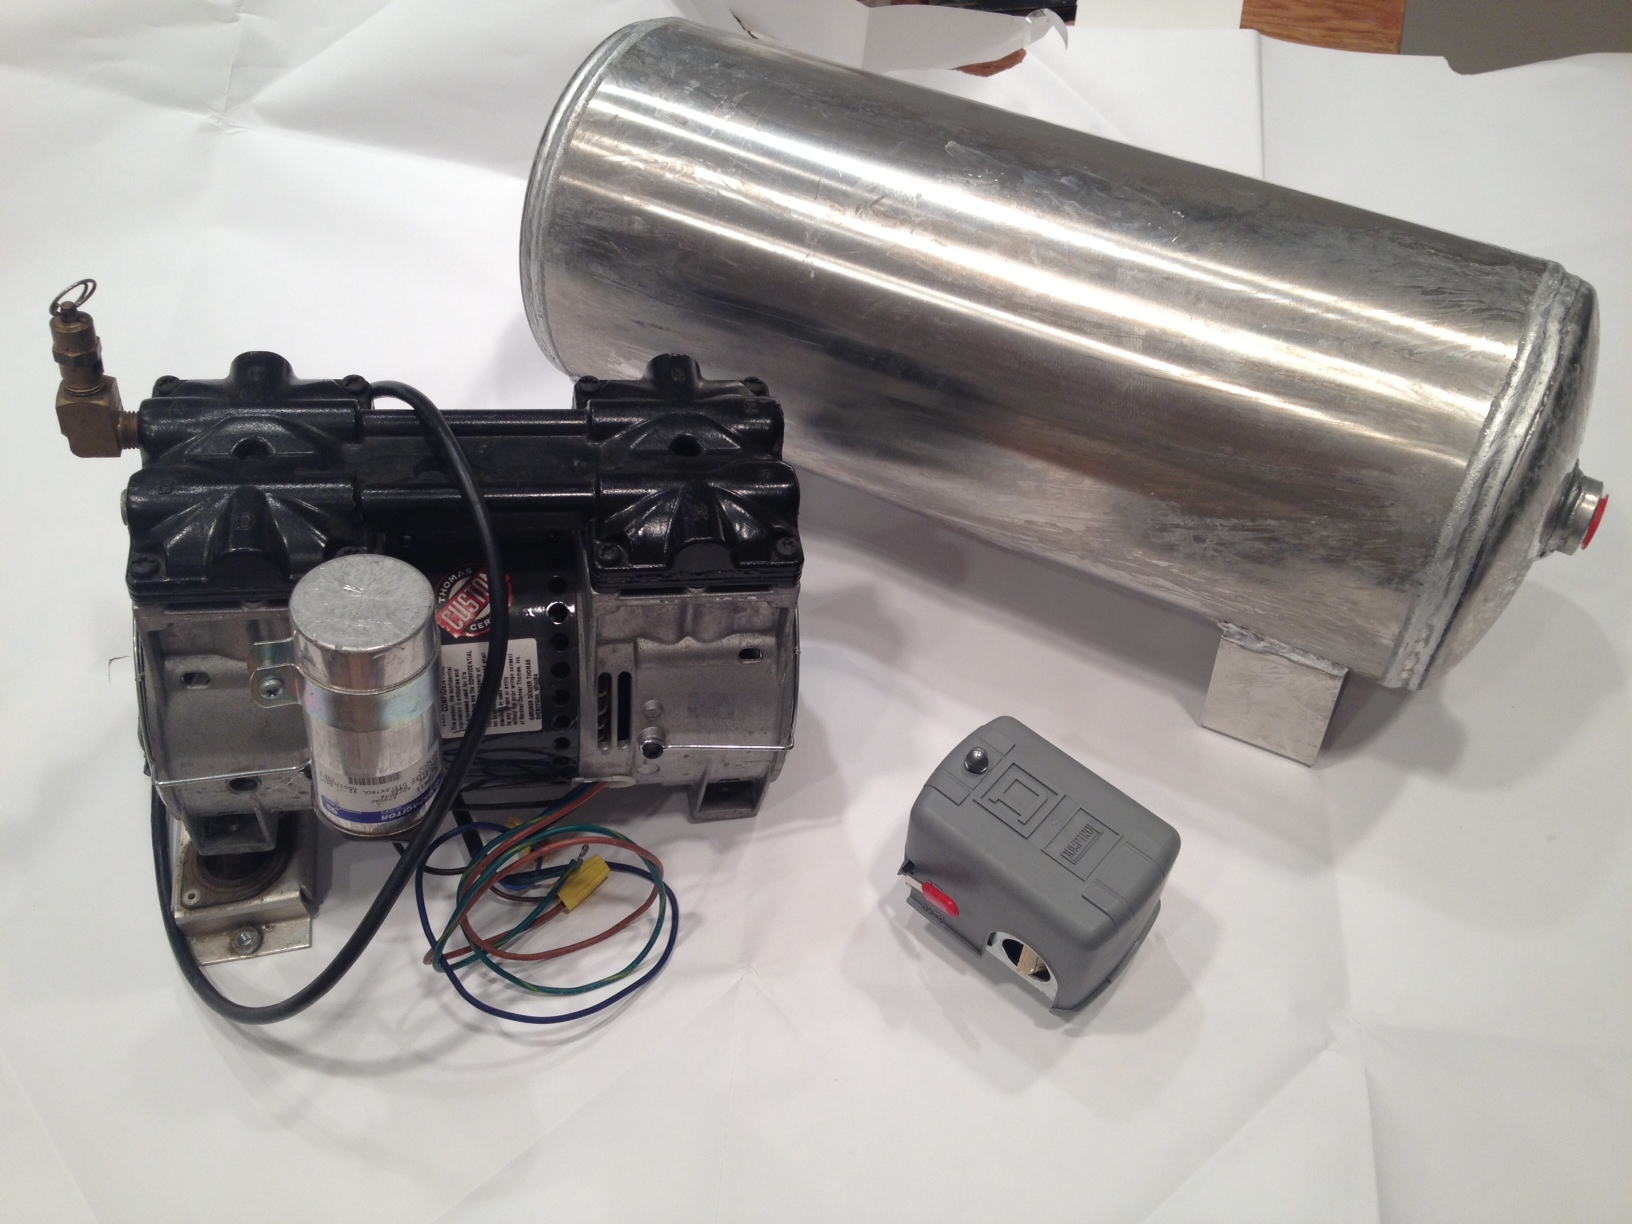
Left to right: Air compressor, air tank, compressor switch
The air compressor is a Thomas & betts unit I got at C&H surplus (super cool store, check it out if you’re in SoCal). It has twin cylinders and puts out more CFM at a lower decibel than most compact air compressors.

Left to right: water pump, auger for plastic hopper, cartridge heaters
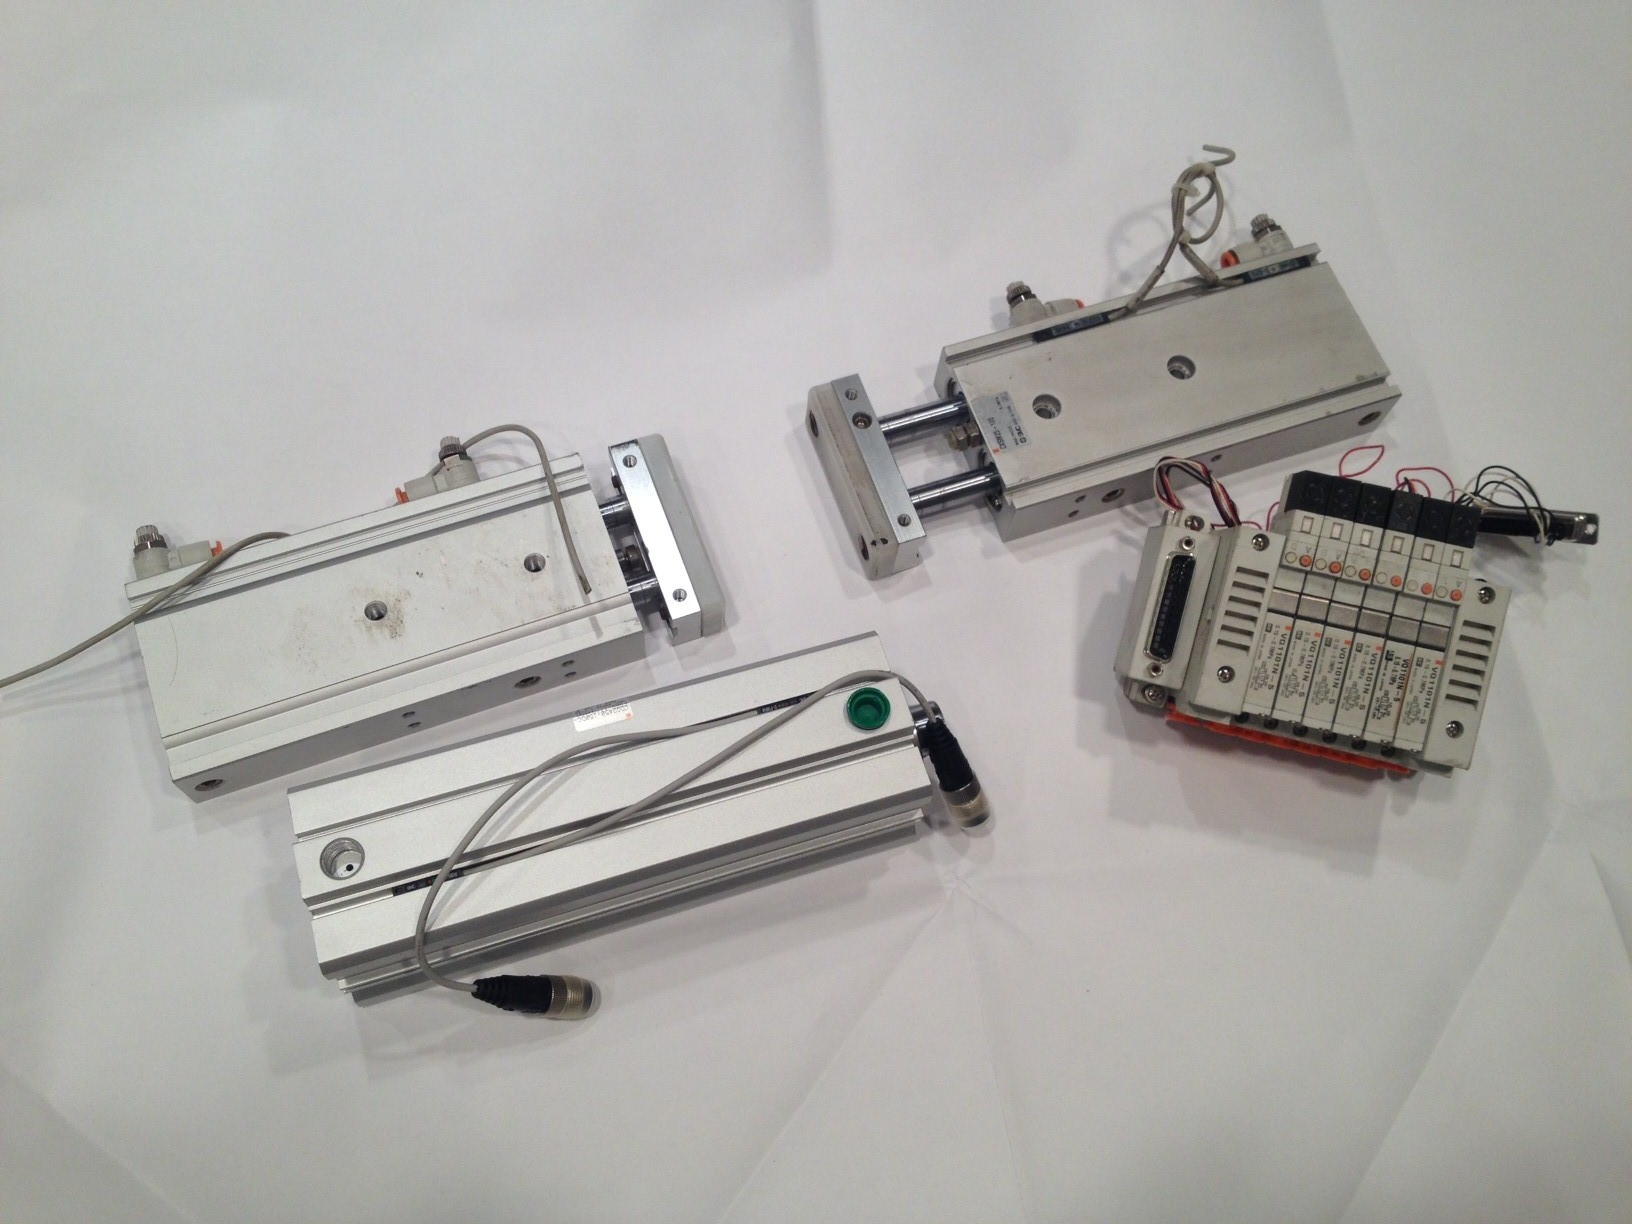
The top two cylinders move the mold halves together, the bottom one moves the piston in the plastic injector, and the solenoid manifold on the right controls it all.

50lbs of hard to find plastic
The ability to buy the plastic pellets was a make or break moment for this project. There were not a whole lot of suitable replacements for this particular plastic (more specifically, polyethylene wax). Fortunately the west coast distributor for this happened to be close and had several bags it was willing to sell to me (normally this product only sold in 1000kg pallets, which is about 950kg more than I need). Getting a hold of this was a major load off my mind.
It’s like the warehouse in Indiana Jones, but instead of ancient relics there’s plastic resin.
I’ve begun cutting metal for the frame and plastic melt pot, hopefully welding will start this week!
