Building a CNC Mill Stepper Driver

When I bought my Sherline mill, it came with stepper motors, but no driver box. The drive box takes the output from a PC parallel port (small electrical signals indicating which axis should move and in what direction).

Drive boxes contain several essential parts:

  1. Power supply
  2. Stepper motor drivers
  3. Break out board
  4. Connectors
  5. Fuses and wiring

I’m kind of particular about the control electronics of a piece of equipment. Control electronics should be layout in such a way that they are easily serviced. Nothing worst than trying to trace down a problem in a rats next of wiring. Below is as list of some practices I like to use when laying out an electronics enclosure.

  1. Components should be spaced to allow airflow around them
  2. Components should be removable without taking out an inordinate amount of other components
  3. Mount components to a removable panel, rather than directly to the enclosure
  4. Wiring should be neatly bundled, using removable wiring loom where possible
  5. Removable connectors are preferred over soldered connections
  6. Wire ferrules should be used when making connections to terminal blocks.
  7. Wiring going to a removable external panel should have extra length to allow the panel to be removed without straining connections (called a service loop)

Finding the right enclosure was probably the hardest part of this project, mostly because I had many criteria.

  1. Mostly made of metal
  2. Top should be removable without taking front or rear panel off
  3. Removable front and rear panels
  4. At least 10″x10″ and ideally ~4″ tall (based on some rough dimensions of the power supply and driver)
  5. Less than $50

I found several enclosures that fit a few of the requirements, such as:

Par-metal table top series. Nice, but too much money.

20s01

Circuit Specialists EM Series Price is right, but a little too tall.

em-04-0
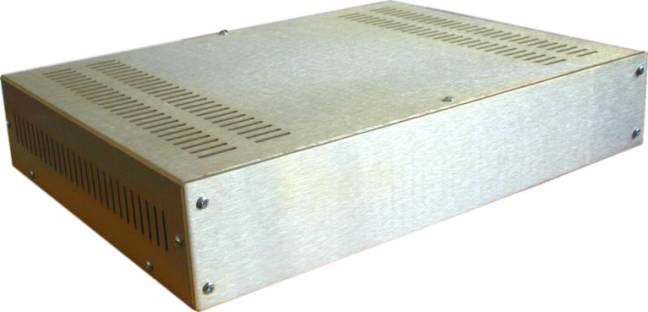
The one I settled on was from eBay, but I also found it on amazon

$_57

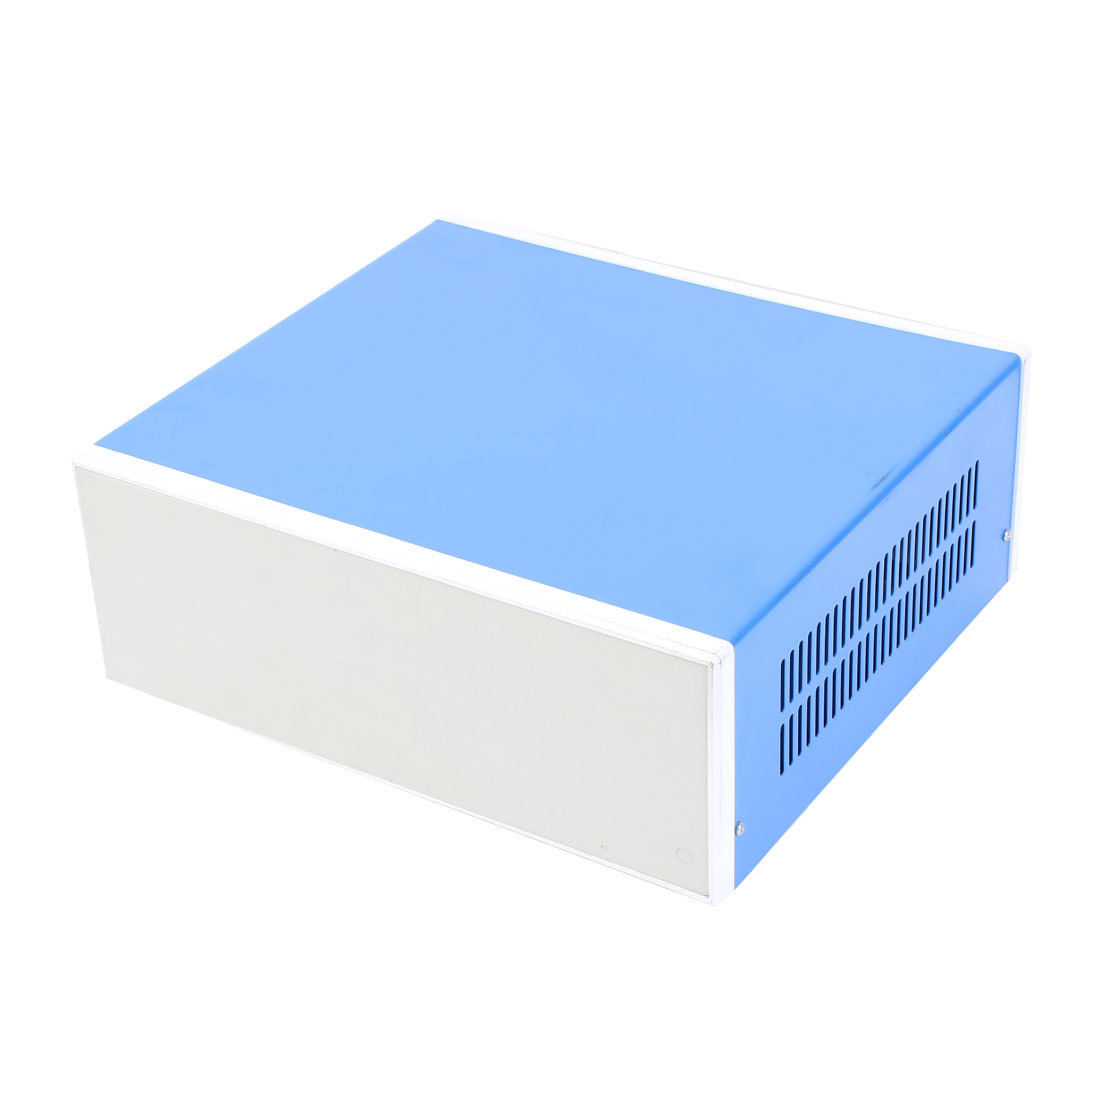
This enclosure fit all my criteria. My only gripe with it would be that the front and back panel are plastic and snap in place instead of using screws.

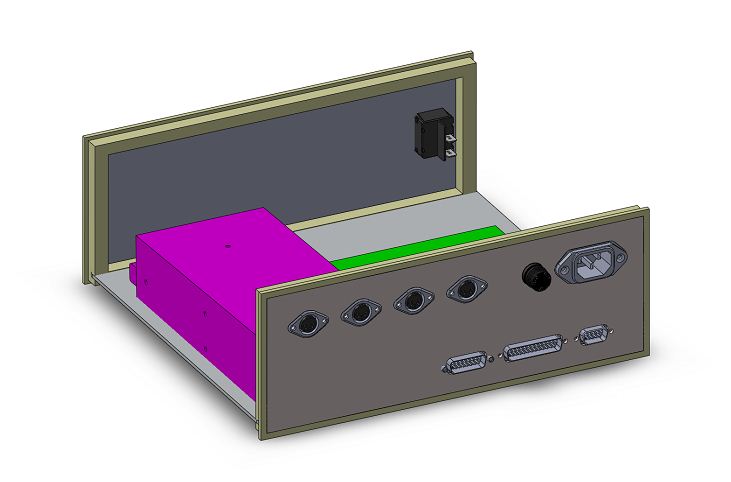
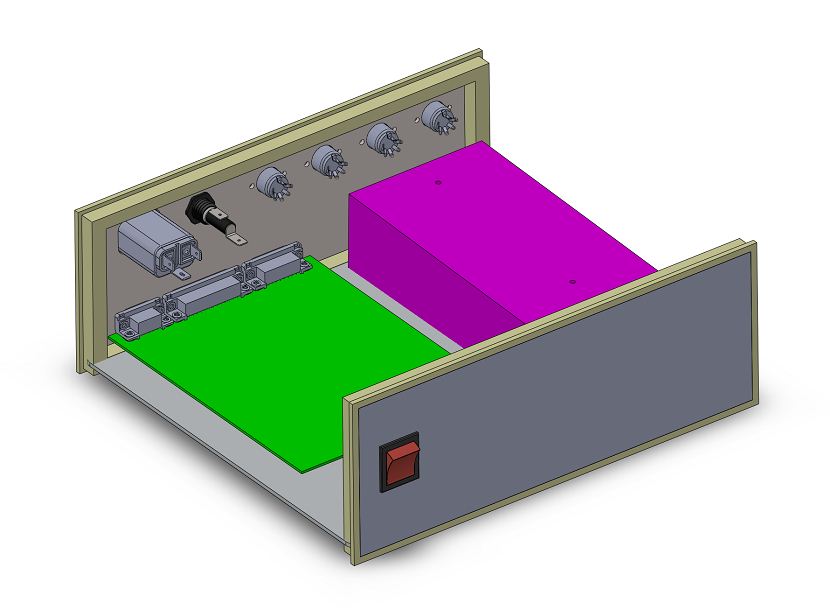
As I mentioned above, mounting components such as drivers and power supplies to a removable panel inside the enclosure makes assembly and service much easier. Parts can be installed and wired on the bench and the panel can be placed into the enclosure in one shot. This is a pretty common practice in industrial control panels. In fact, most enclosure suppliers (like Hoffman) sell panel kits that fit into their enclosures.

I took measurements of the inside of my enclosure and cut a panel out of 0.090″ aluminum sheet. 1/4″ nylon spacers and 8-32 hardware secure the panel to the enclosure. To find the position of mounting holes, I printed out a 1:1 scale outline of the power supply and laid it down next to the driver adjusting their relative locations until I was happy with the clearance.

IMG_4384

IMG_4386

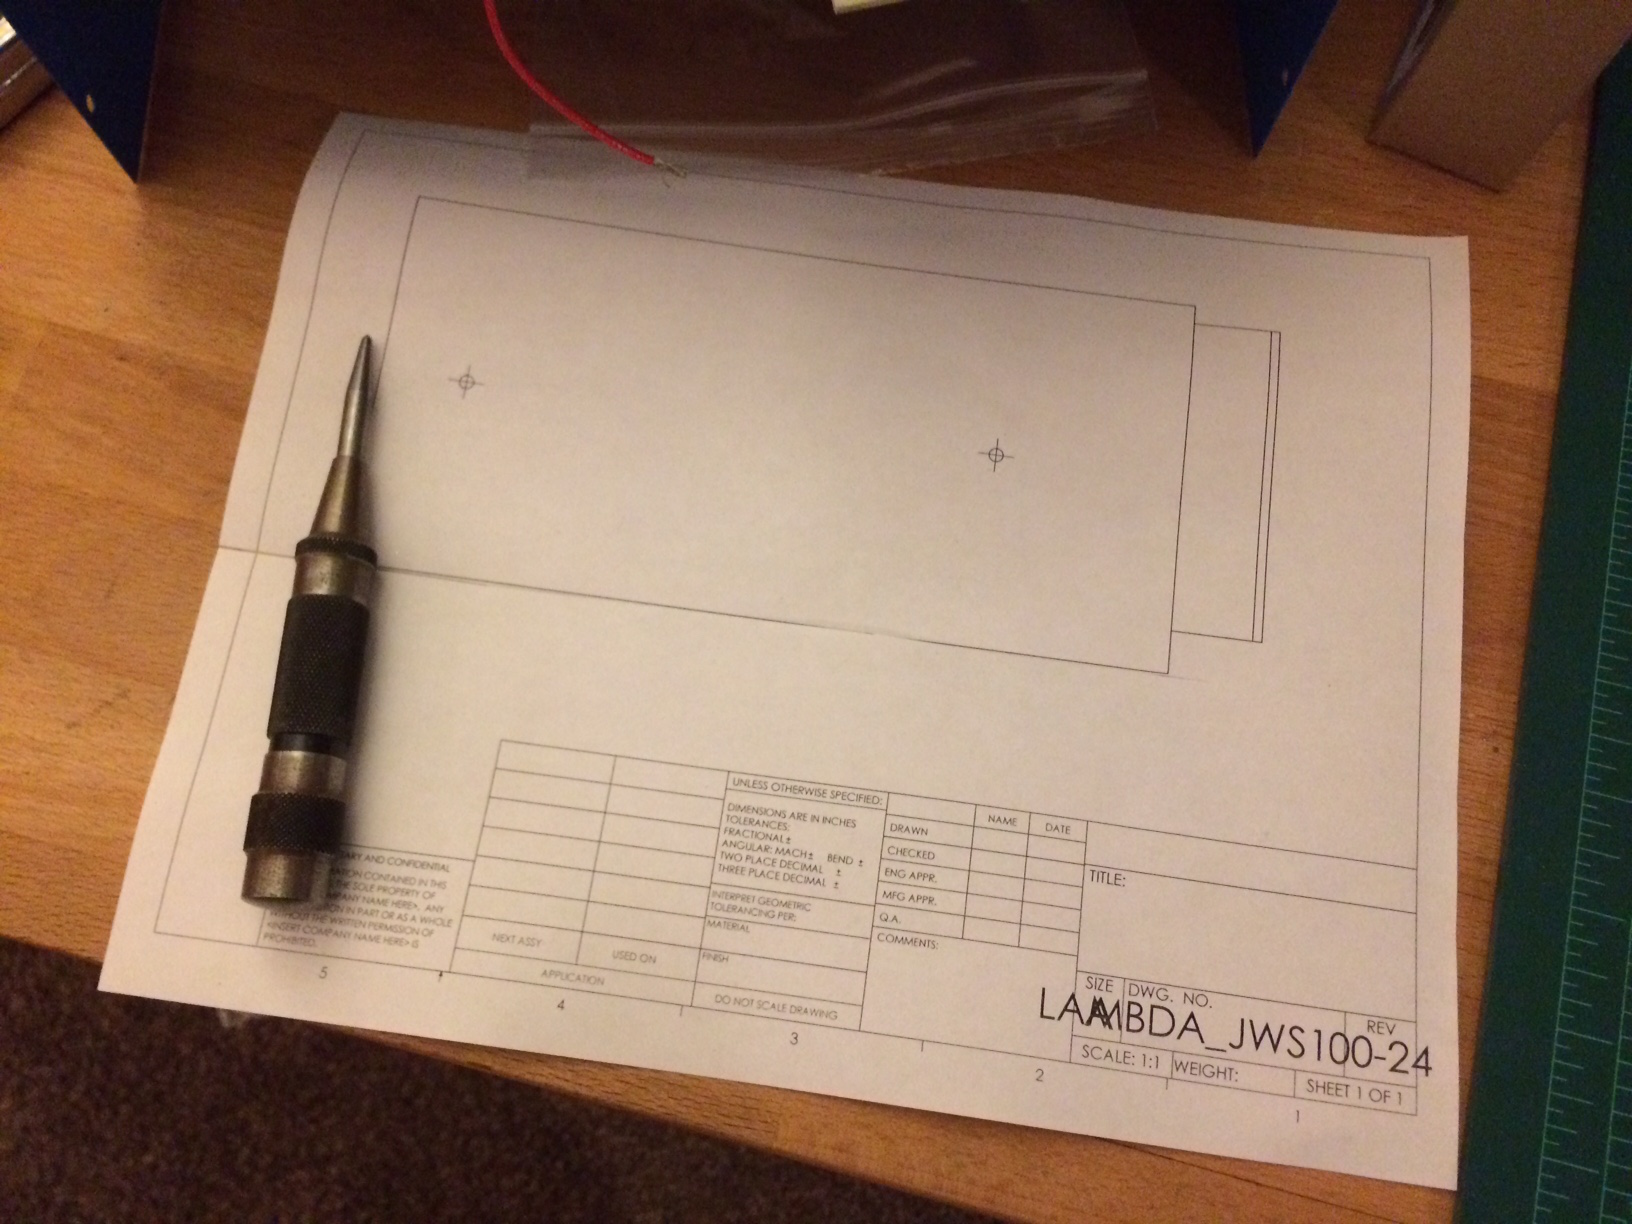
When it came to the rear panel layout I did use CAD software, as I wanted the connectors to spaced evenly and I needed to make sure I had room to run the wiring. Again, I printed a 1:1 scale drawing with the cutouts and screw holes marked, and traced that onto the rear panel.

controller rear controller inside

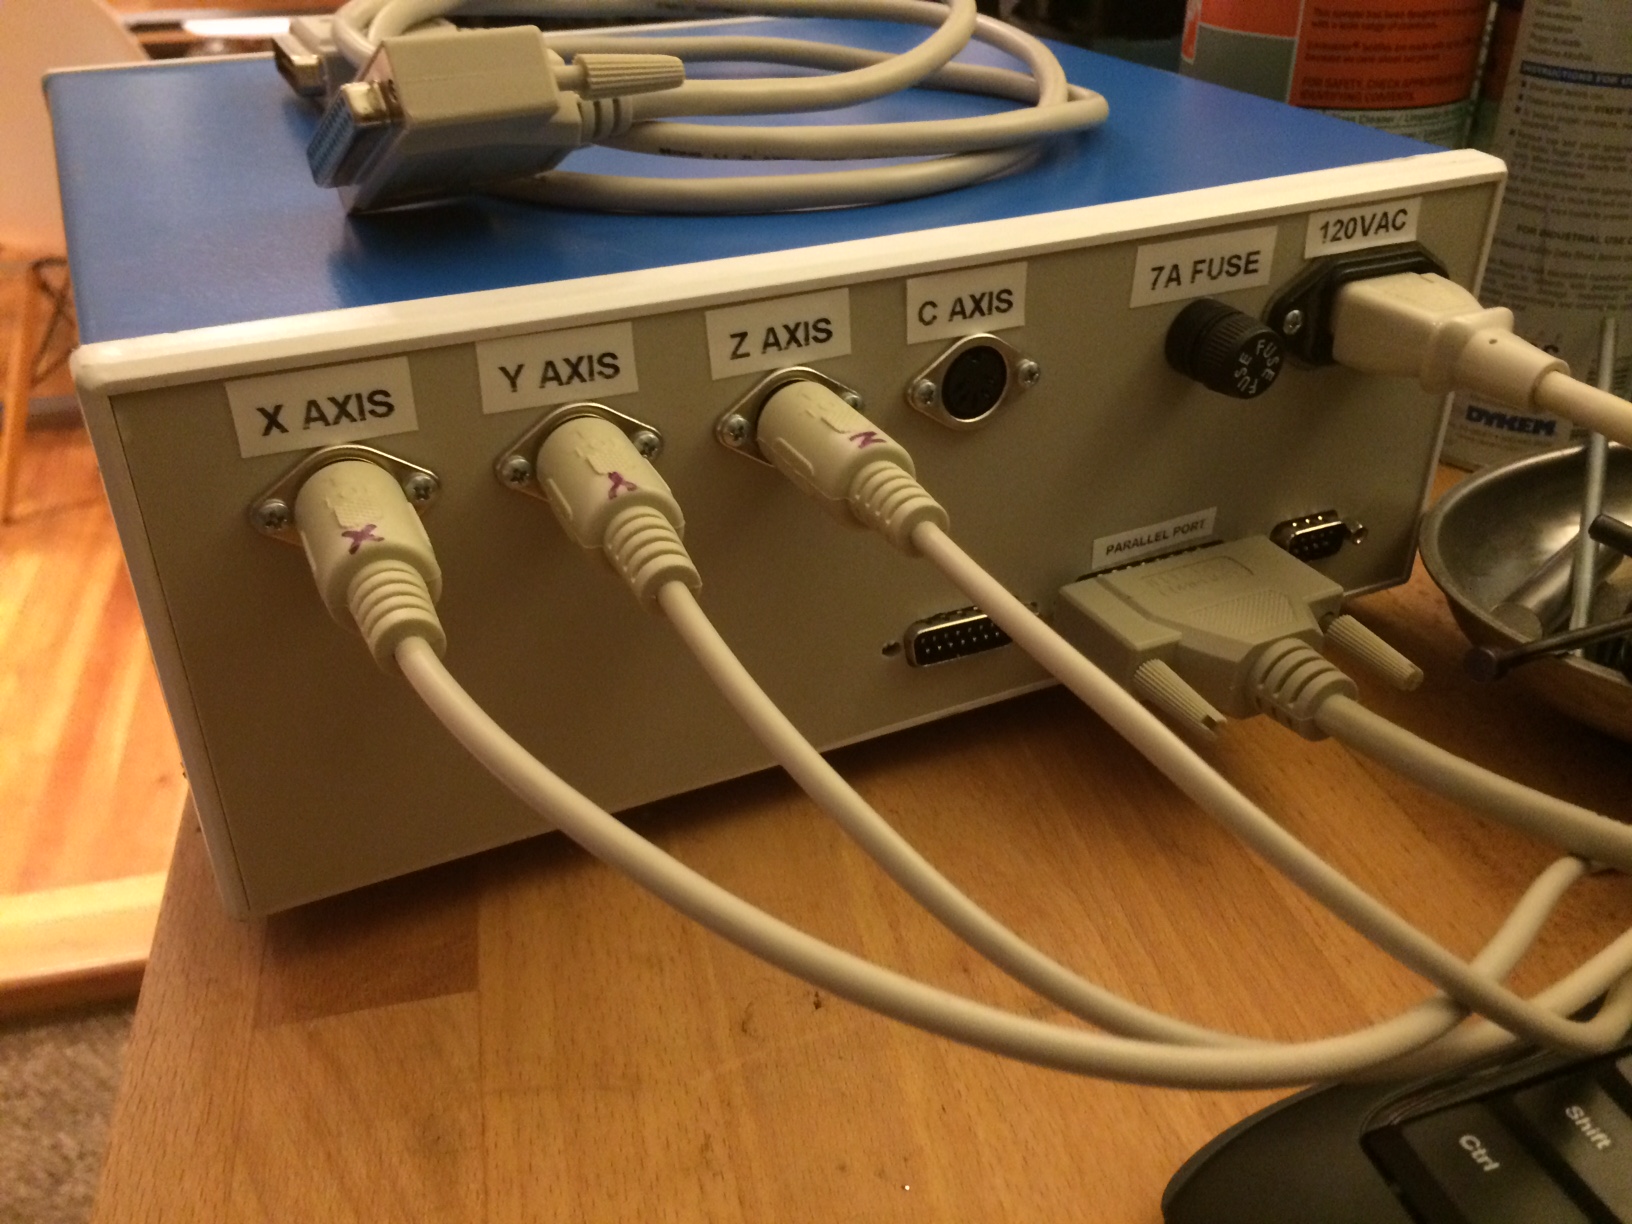
A step drill made quick work of the holes for the circular DIN connectors and AC input fuse.

IMG_4426

The remainder of the cutouts were made on the mill.

IMG_4428 IMG_4431

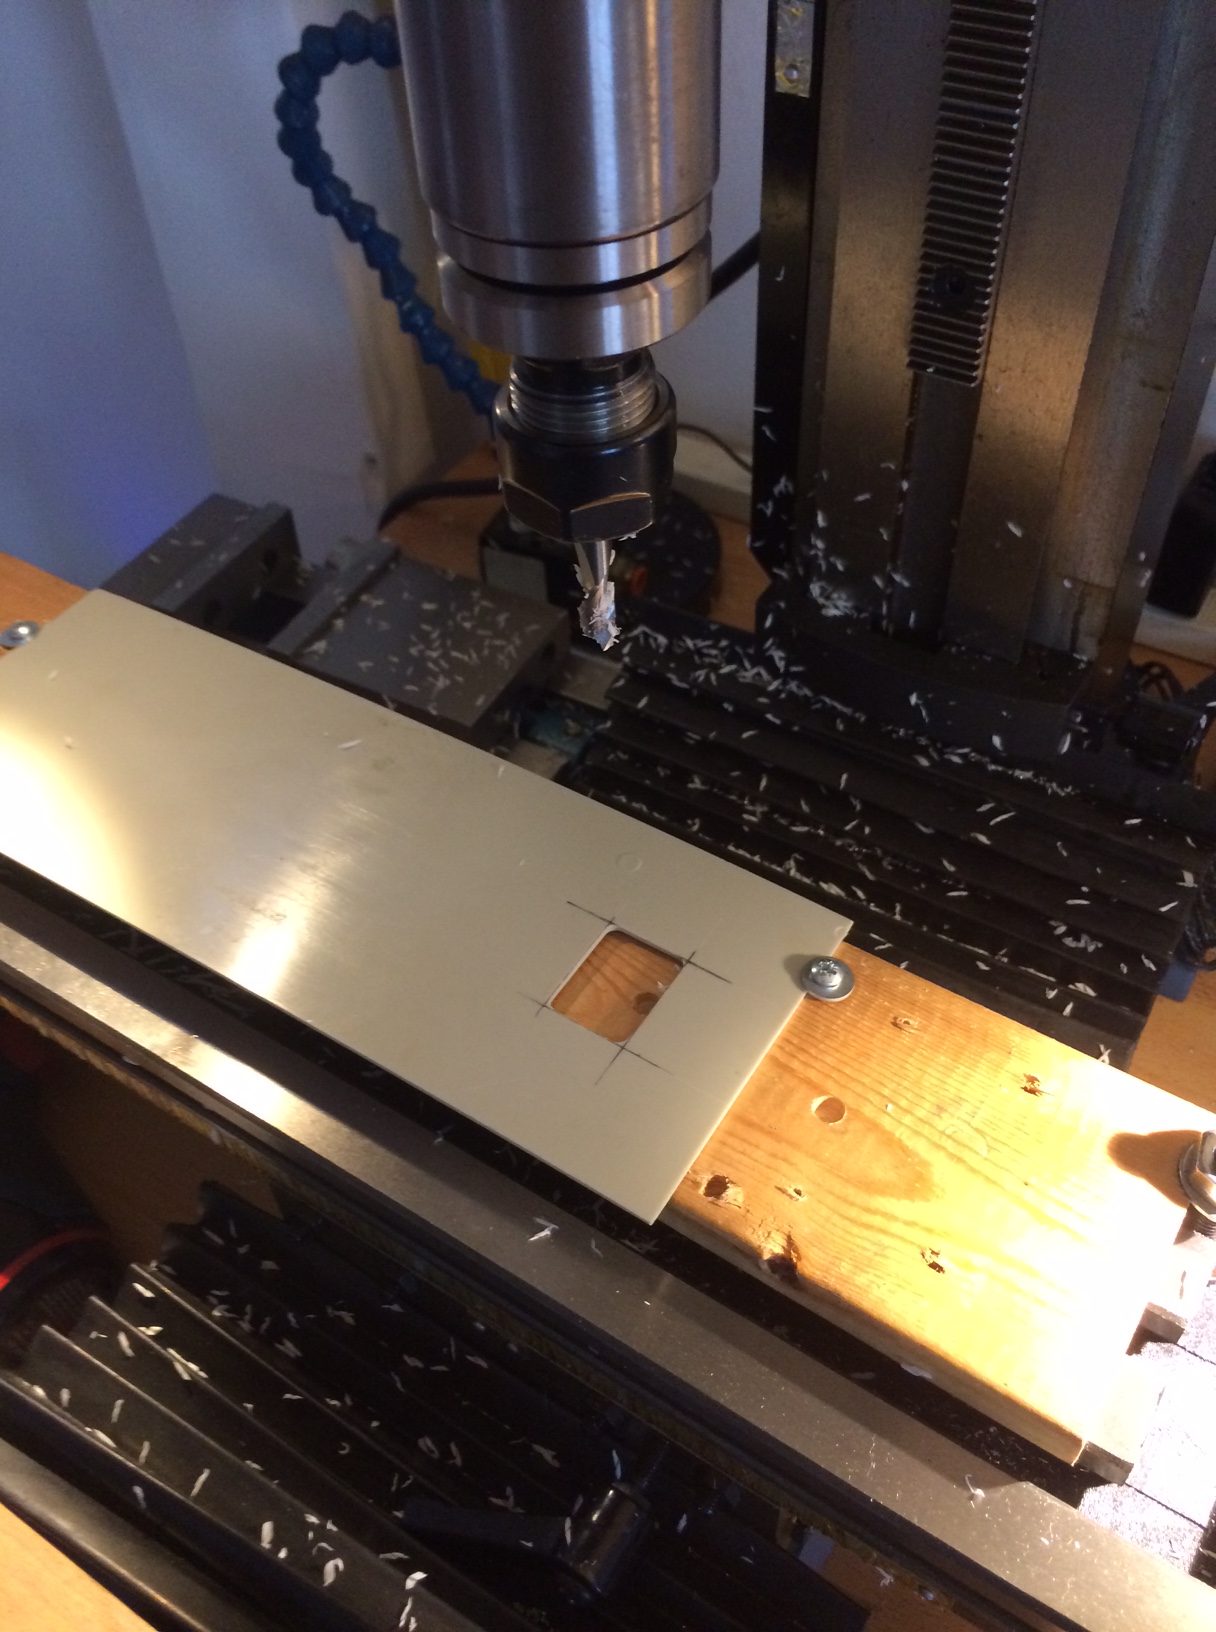
A sharp utility knife squared off the corners of this cutout for the power switch on the front panel.

IMG_4433

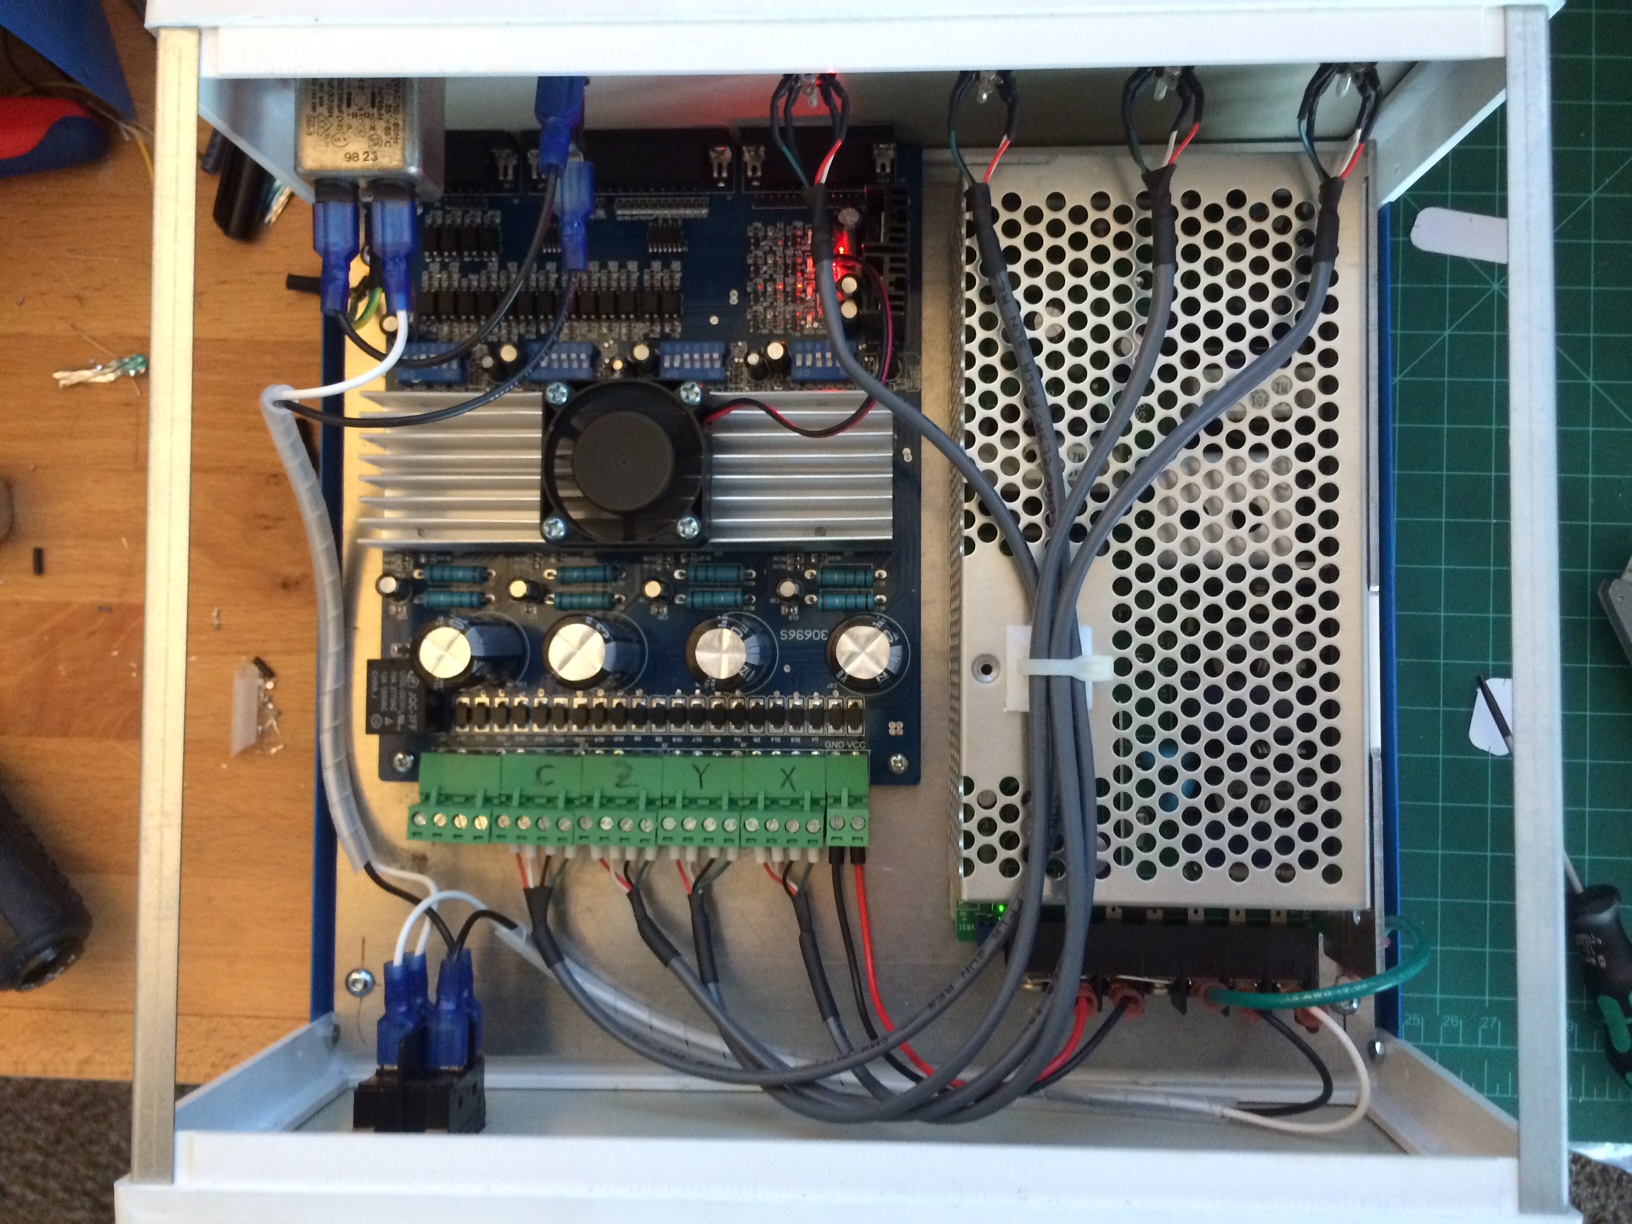
Skipping forward a few steps, the AC input connector and fuse has been installed and wired to the front power switch and power supply.

IMG_4434

I used 4 wire 22 gauge shielded security system cable from McMaster to make the internal connections from the driver board to the DIN connectors. Where the wires connect to the Phoenix connectors (also called Euroblocks, those green pluggable screw terminal connectors) I terminated the wires with wire ferrules and heat shrink over the cable covering.

IMG_4416

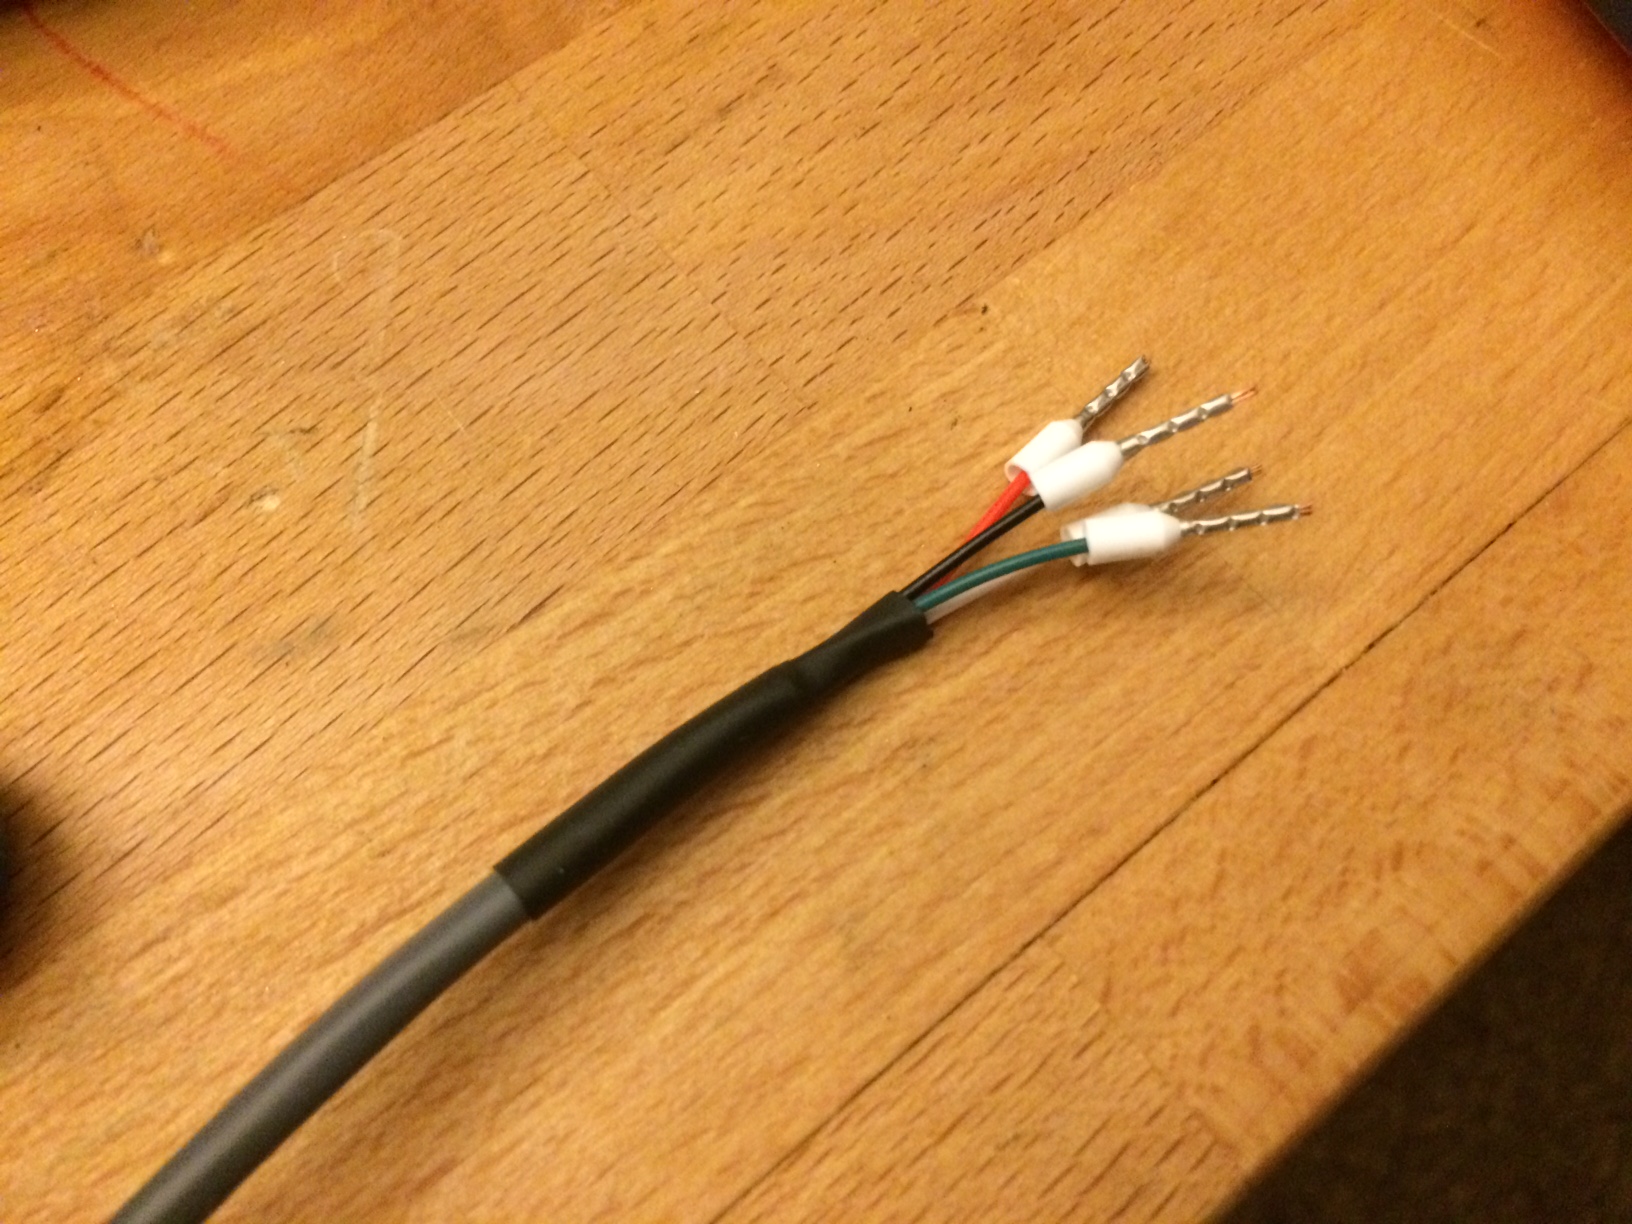
Using wire ferrules instead of bare stranded wire in a screw terminal is good practice, as the strands of wire tend to get broken in screw terminals, increasing the contact resistance.

If you’d like to learn more than you ever probably wanted to about wire ferrules and their use, see this white paper from Weidmuller.

IMG_4435

IMG_4436

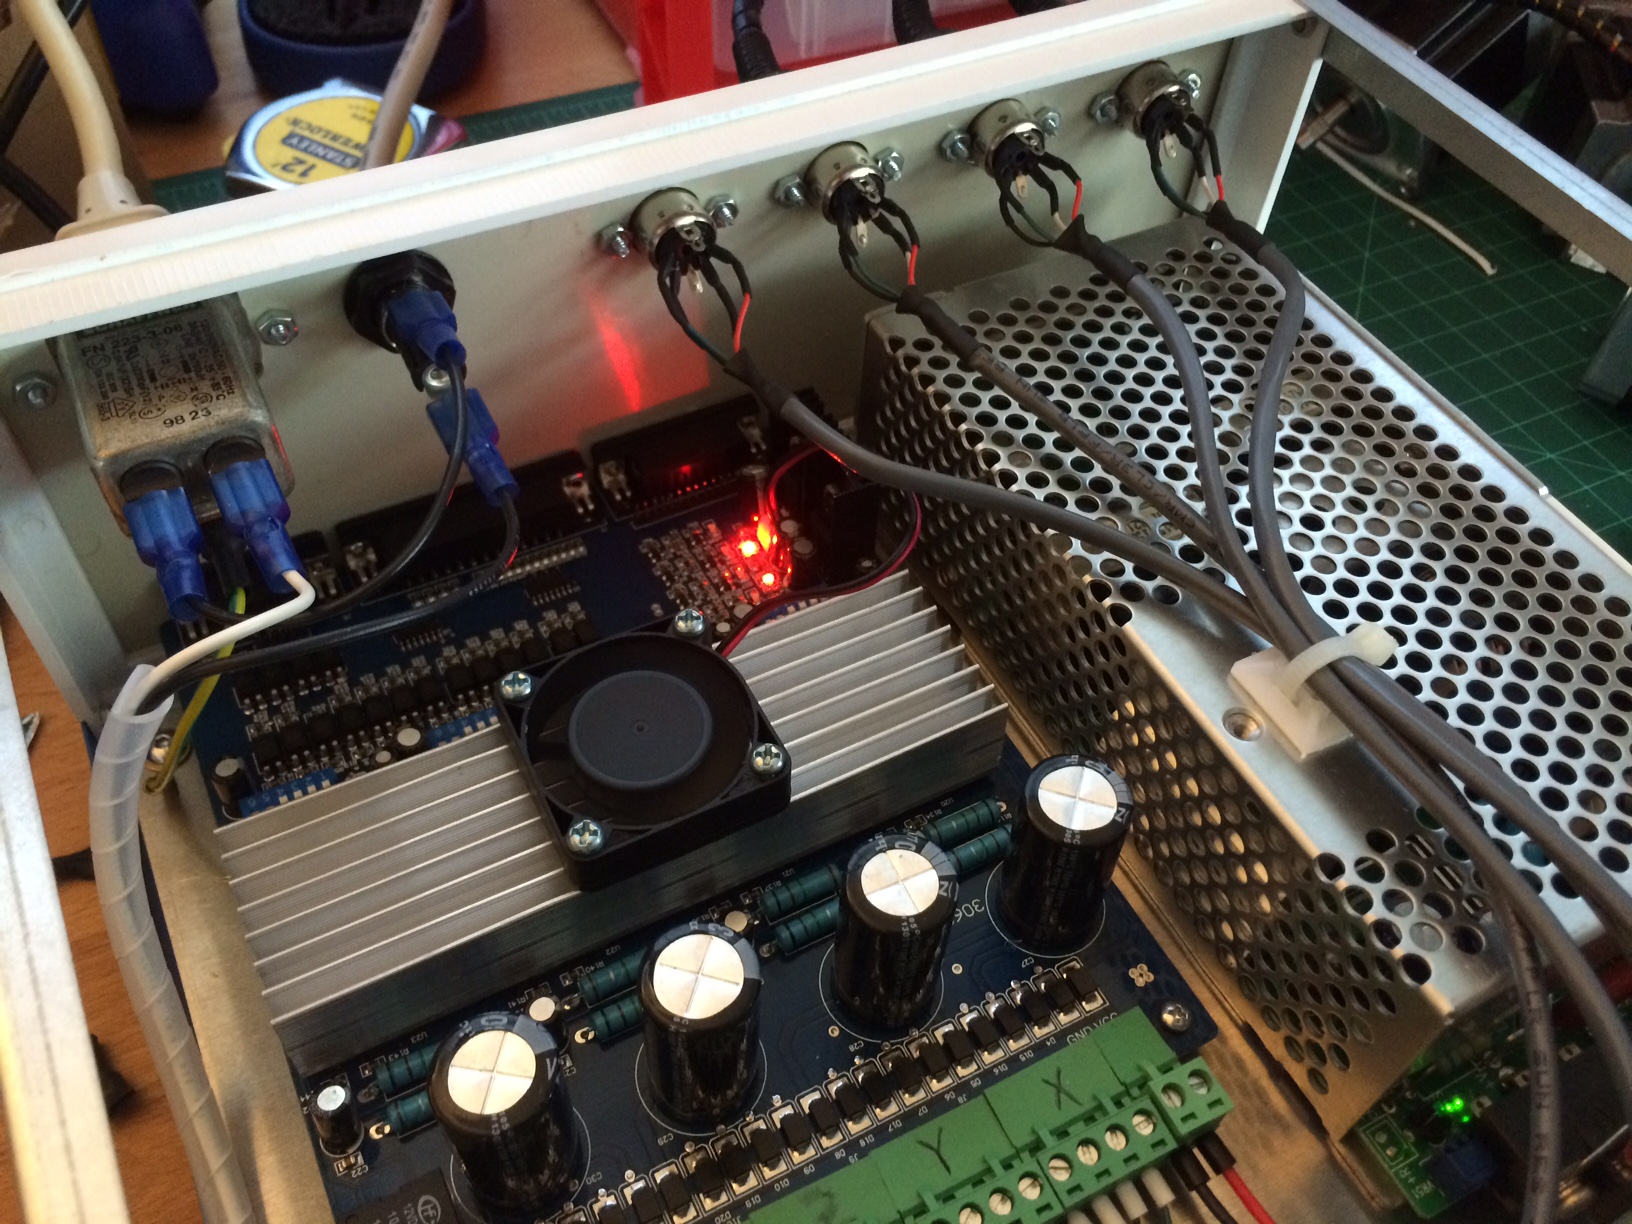
A cable tie mount on the power supply neatly bundles the stepper motor cables.

IMG_4437

One last overall shot

IMG_4438

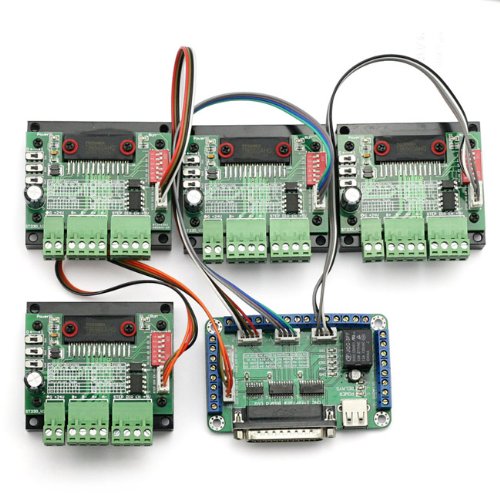
At this point I thought I was done. However, my decision to use the 4 axis all-in-one board was bugging me. It’s known to be buggy, and if one axis blew the board could be taken out entirely. In the name of making a more robust driver, I switched to individual axis drivers and a break out board.

513su4LQ-GL

The breakout board was pretty easy to mount. 4-40 self tapping screws and nylon spacers secured the board to the enclosure panel. The individual drivers where more challenging. There wasn’t enough room to lay them flat, which meant they need to be mounted on the edge of their heat sink. I thought about a few ways to mount them (screws coming up from the bottom, adhesive, pieces of all thread) before I came up with the idea of using a small strap through the heat sink fin.

Using the same 0.090″ aluminum, I machined some 3/8″x4″ straps, with 1/8″ holes for 4-40 hardware.

IMG_4463
Laying out a hole pattern to space the drivers on a 2″ pitch.

IMG_4464

First test fit.

IMG_4466

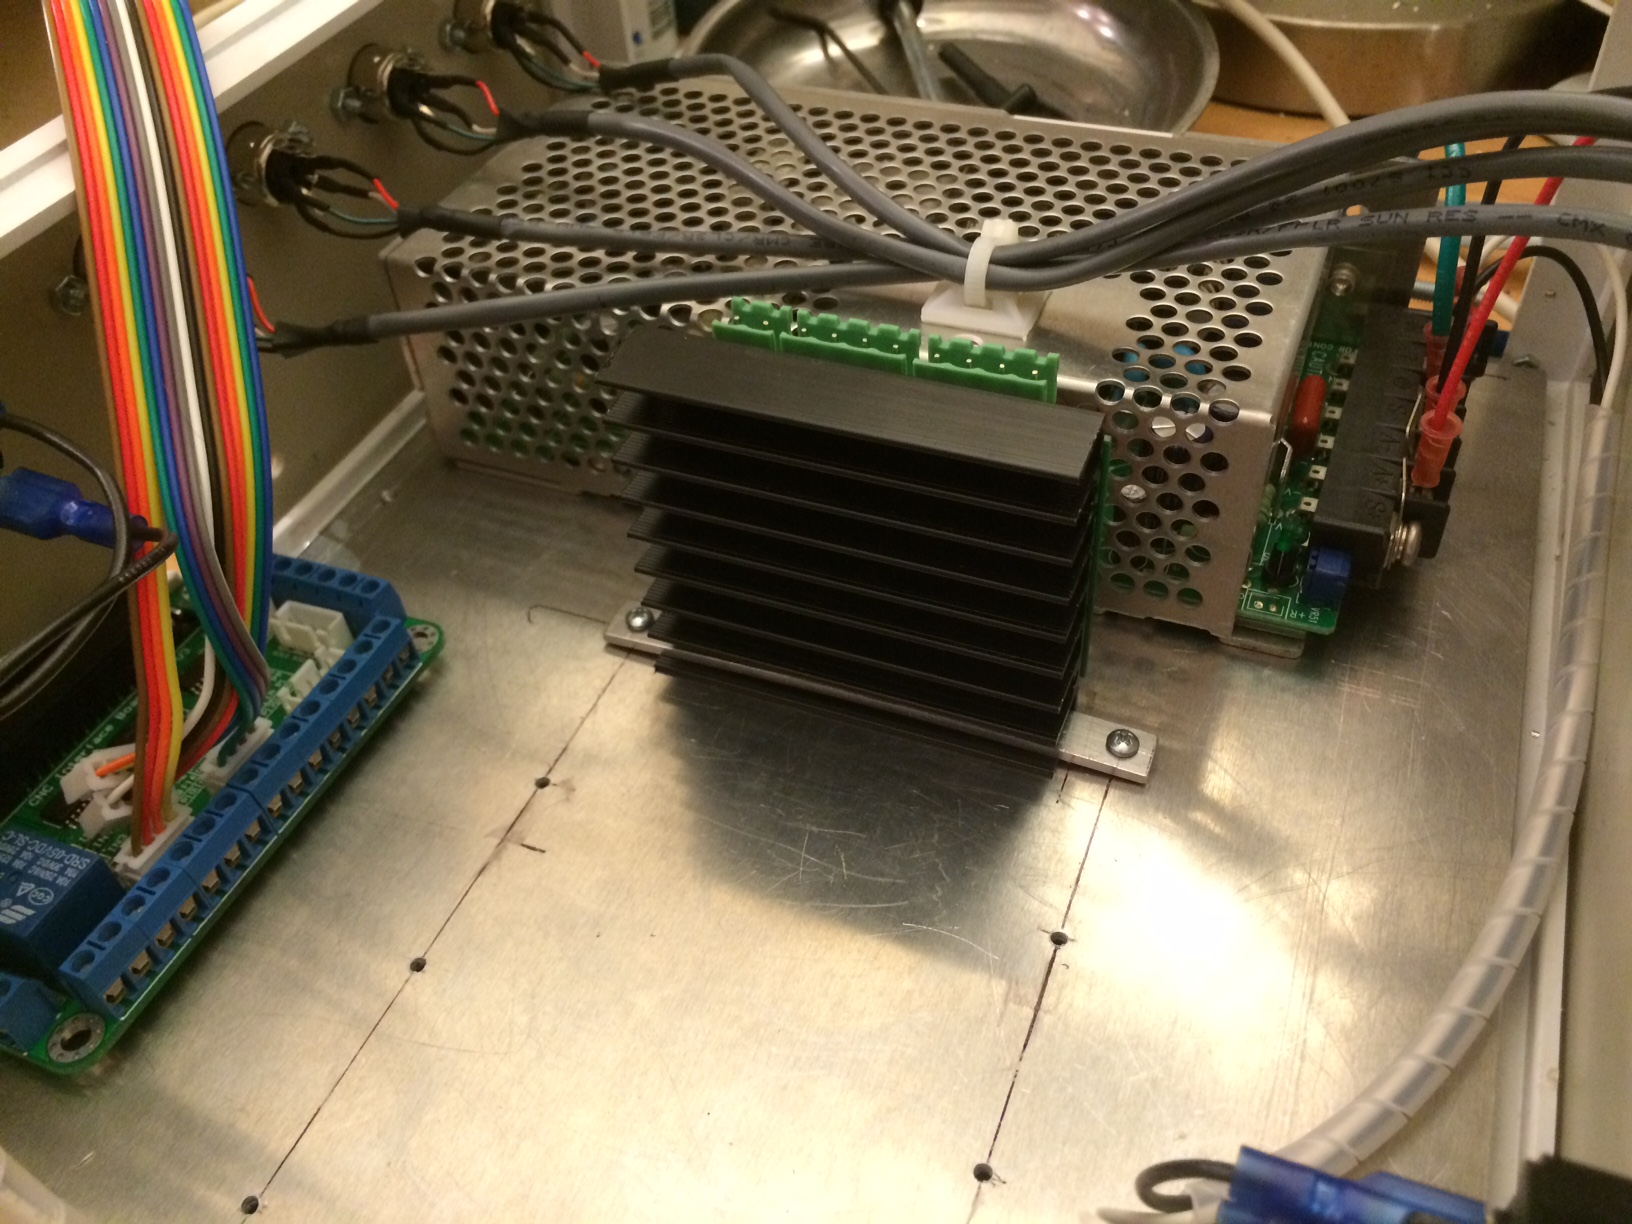
Success! The driver is firmly attached, and most importantly, I can remove the driver easily if I need to change setting on the DIP switches. An added bonus is that the heat sink can conduct some of its heat away to the aluminum panel beneath it.

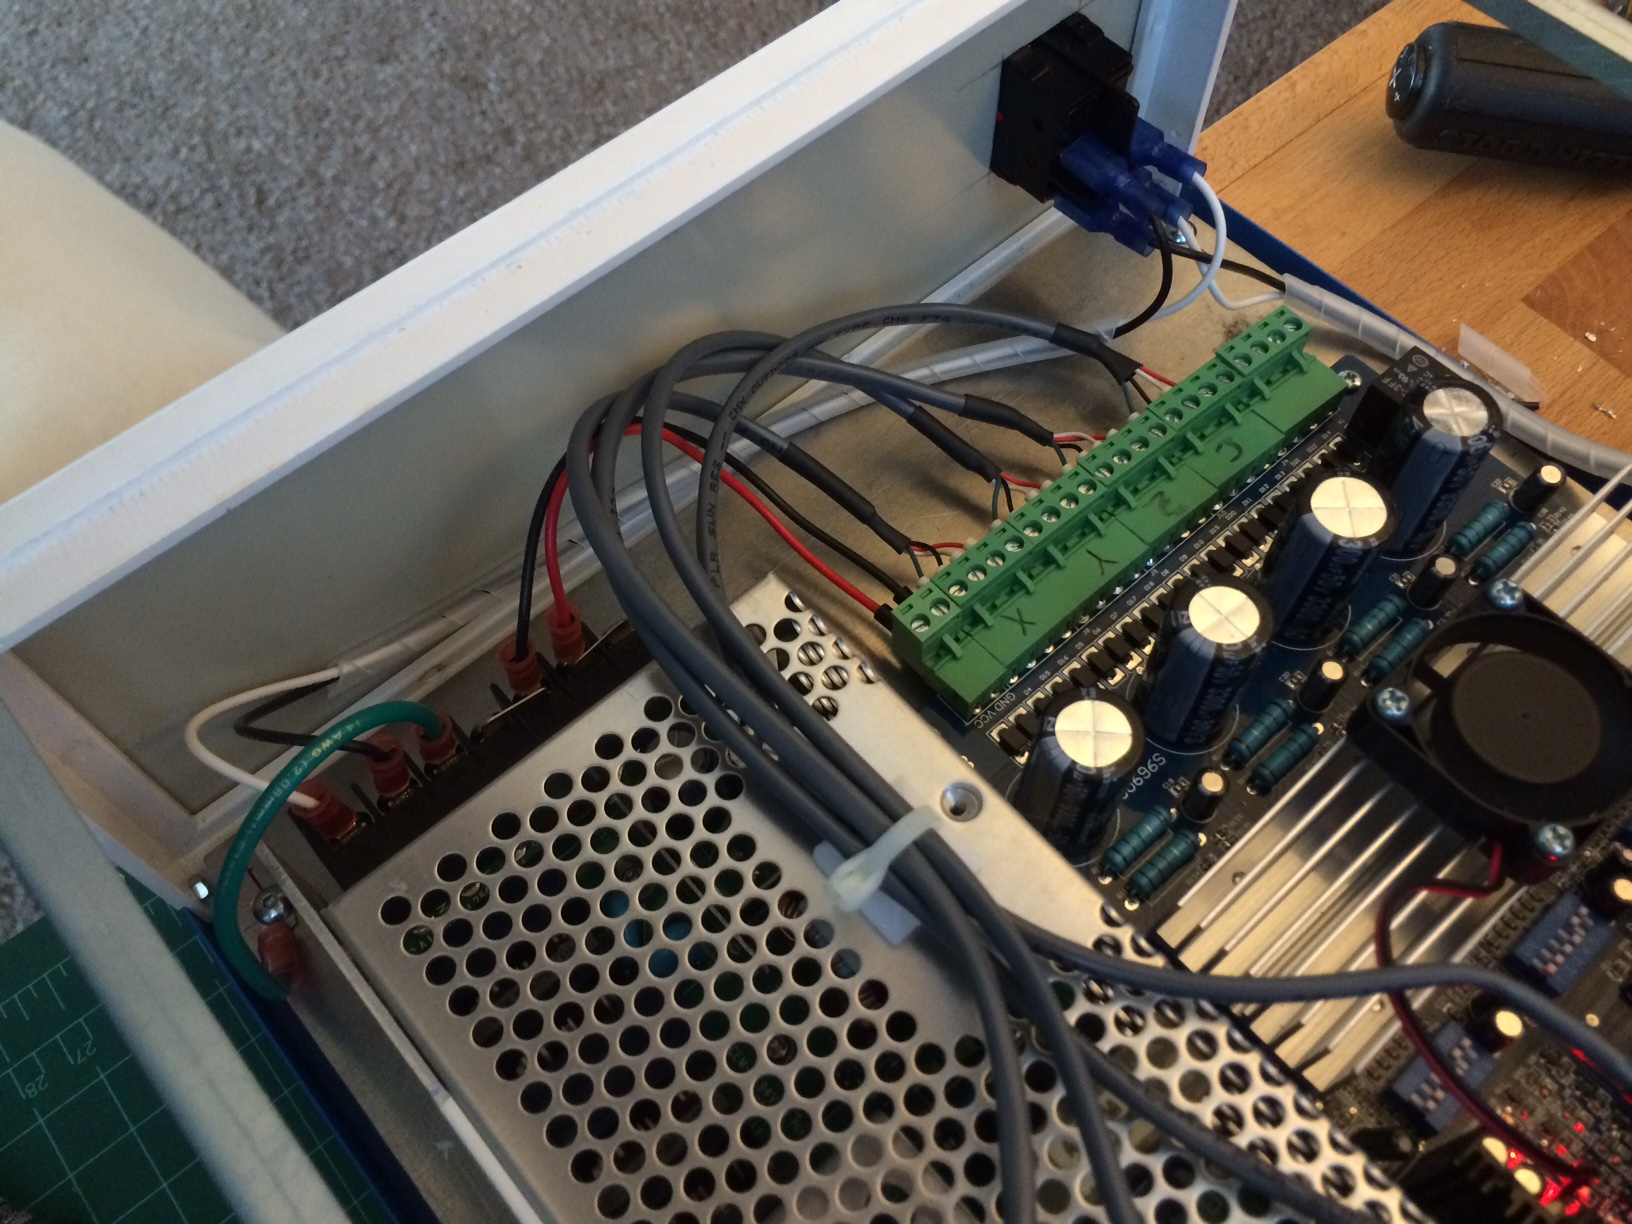
Fortunately the wiring I had made previously for the stepper outputs fit fine, so those did not have to be remade.

IMG_4467

Some labels on the back finish the driver box off.

IMG_4443

IMG_4444

Advertisement

DIY Mold-A-Rama Update 3

A lot of progress has been made in the last few months on my version of the 1960’s classic Mold-a-Rama machine.

The design has been further refined

  • The frame where the mold cylinders attach has been changed from 80/20 to 1″ square aluminum tubing.
    • This change was made because I was having a hard time mounting and aligning the various components to the slots in the aluminum extrusion.
    • The mold halves will press against each other with several hundred pounds of force; the friction fit nature of t-slot construction would likely have failed under this load. The new frame is a one piece welded structure.
    • The new frame, while not re-configurable, will be much stronger and allow for easier alignment of the plastic tank and mold halves.

overview_2_15_13

  • The plastic pump has been completely redesigned
    • I’ve switched from a right angle gear motor to an air cylinder driven piston pump (think giant aluminum syringe)
    • This change eliminated a complex machined part ($$$) and replaced it with a much simpler welded tube and plate design ($)

melt pot complete_2_15_13

  • The actual mold cylinders have been selected
    • So much of the design decisions and components selections have been driven by what I can get on the surplus market  Case in point: the mold cylinders. I’ve seen that the actual mold-a-ramas have an enormous amount of play in their mold cylinders and mounts. I thought using a twin piston cylinder would help with the side loading on the pistons (due to the weight of the molds want to slide down on the angled frame. I found a good price for two twin piston SMC cylinder on eBay (with sensors and flow control fittings!)
    • I designed a robust mounting system using aluminum tube, bronze bearings, and 5/8″ steel shafting.

mold cylinders_2_13_15


Parts have been bought

I’ve also been spending quality time on eBay, at surplus stores, and throwing money at various other online retailers. Here’s where some of the money has gone:

photo 2

Left to right: Air compressor, air tank, compressor switch

The air compressor is a Thomas & betts unit I got at C&H surplus (super cool store, check it out if you’re in SoCal). It has twin cylinders and puts out more CFM at a lower decibel than most compact air compressors.

photo 3

Left to right: water pump, auger for plastic hopper, cartridge heaters

photo 1

The top two cylinders move the mold halves together, the bottom one moves the piston in the plastic injector, and the solenoid manifold on the right controls it all.

photo 4

50lbs of hard to find plastic

The ability to buy the plastic pellets was a make or break moment for this project. There were not a whole lot of suitable replacements for this particular plastic (more specifically, polyethylene wax). Fortunately the west coast distributor for this happened to be close and had several bags it was willing to sell to me (normally this product only sold in 1000kg pallets, which is about 950kg more than I need). Getting a hold of this was a major load off my mind.

BA6JS4JCcAAwIJm

It’s like the warehouse in Indiana Jones, but instead of ancient relics there’s plastic resin.

I’ve begun cutting metal for the frame and plastic melt pot, hopefully welding will start this week!

Automated Piston Cycler Device with Arduino

I built this control box to cycle a piston in some of our assemblies at work. We had problems with rebuilt assemblies sticking after a few hours of cycling. The rebuilders couldn’t test this because they would have to manually cycled the piston back and forth many times to verify the functionality (time-consuming). This piston cycler is capable of automatically cycling a dual action cylinder at an adjustable rate, and enable the operator to pause the motion to make adjustments, and continue testing. The counter keeps track of the number of cycles for record keeping purposes. Here’s how I made it.

Continue reading

Bike Light Parts Arrive

All the parts for my mega P7 bike light have arrived. The driver from Kai Domain came relatively quickly, but the P7 LED emitter from Deal Extreme took forever to arrive. Of course the driver came without any sort of labels or instructions so I’m going to have to search the candlepower forums to figure out how to hook it up. Now that I have all the parts I am going to draw them in solidworks and start designing the housing around them. The reflector ended up being much larger than I had thought so I may not use it.

Solution in Search of a Problem

Years ago I had a Canon GL-1 camcorder, and it came with this massive battery that allowed for 3 or 4 hours of continuous operation. It was one of those generic aftermarket batteries so after a few months the casing started to split apart and would no longer stay attached camera. So for the past 3 years I have been carrying this around with me:

DSC_0164

Continue reading

Electronics Flea Market

While in the bay area this weekend  I stopped at the Electronics Flea Market. This swap meet occurs on the second Saturday of the month during the summer, and is held at De Anza College in Cupertino. The majority of the stuff being sold falls into one of three categories: ham radio equipment from the 40’s, miscellaneous circuit components, and electronics from the 80’s.  In addition,  most of the cliental are either in their 40’s or in their 70’s. I guess the lure of 30 year old test equipment and  tube transistors has a specific audience. At any rate, there were some pretty cool stuff hidden among all the junk.

photo-1

I had a homework problem in my machine elements course that used this exact gear box.
Continue reading