
This weekend I wrapped up my modern dining room table project by installing the legs. Rather than 4 individual legs, I chose two trapezoid shaped metal frames on each end.

This table won’t have an apron, which gives rigidity to a table. Think of the point where the table attaches to the legs as a hinge. The further away from the hinge that the leg is supported the more rigid the connection, so apron = good, stretcher = better.
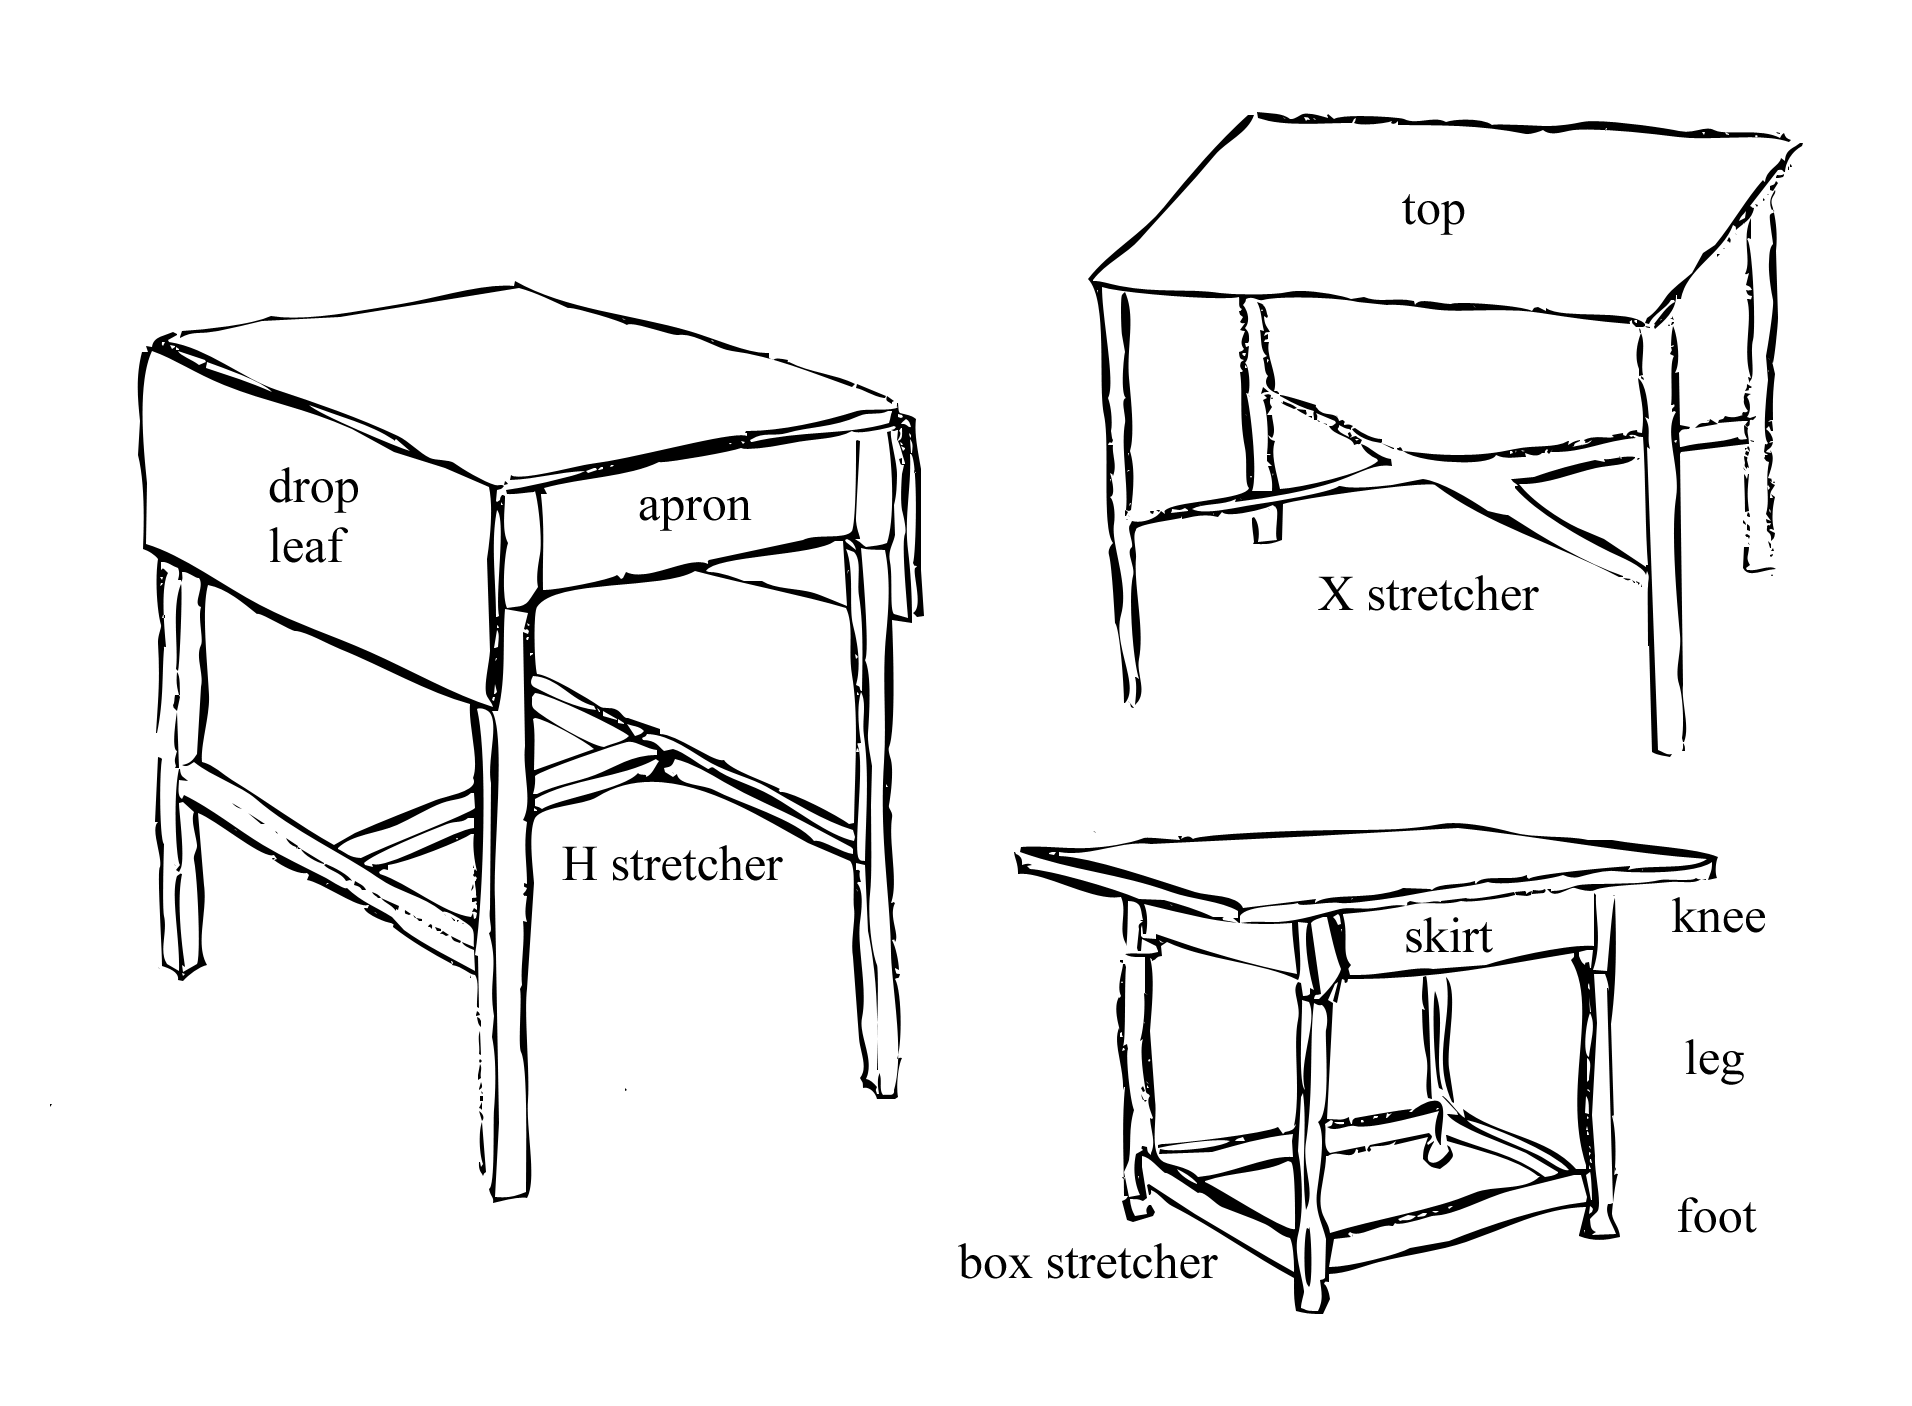
With a leg configuration like I have you’d normally need a stretcher between the legs to prevent the table from wobbling side to side.

How to make a stable table. able.
To eliminate the need for a stretcher, the flanges where the top connects to the legs were made extra wide by adding a piece of 3/16″ angle to the steel tubing. 1/4″ lag bolts secure the legs to the top (pre-drill so you don’t split the wood!)

I wanted some contrast between the legs and the warm natural look of the reclaimed wood table top. Rather than paint the legs I had them clear coated, allowing the welds and tube seams to show through.
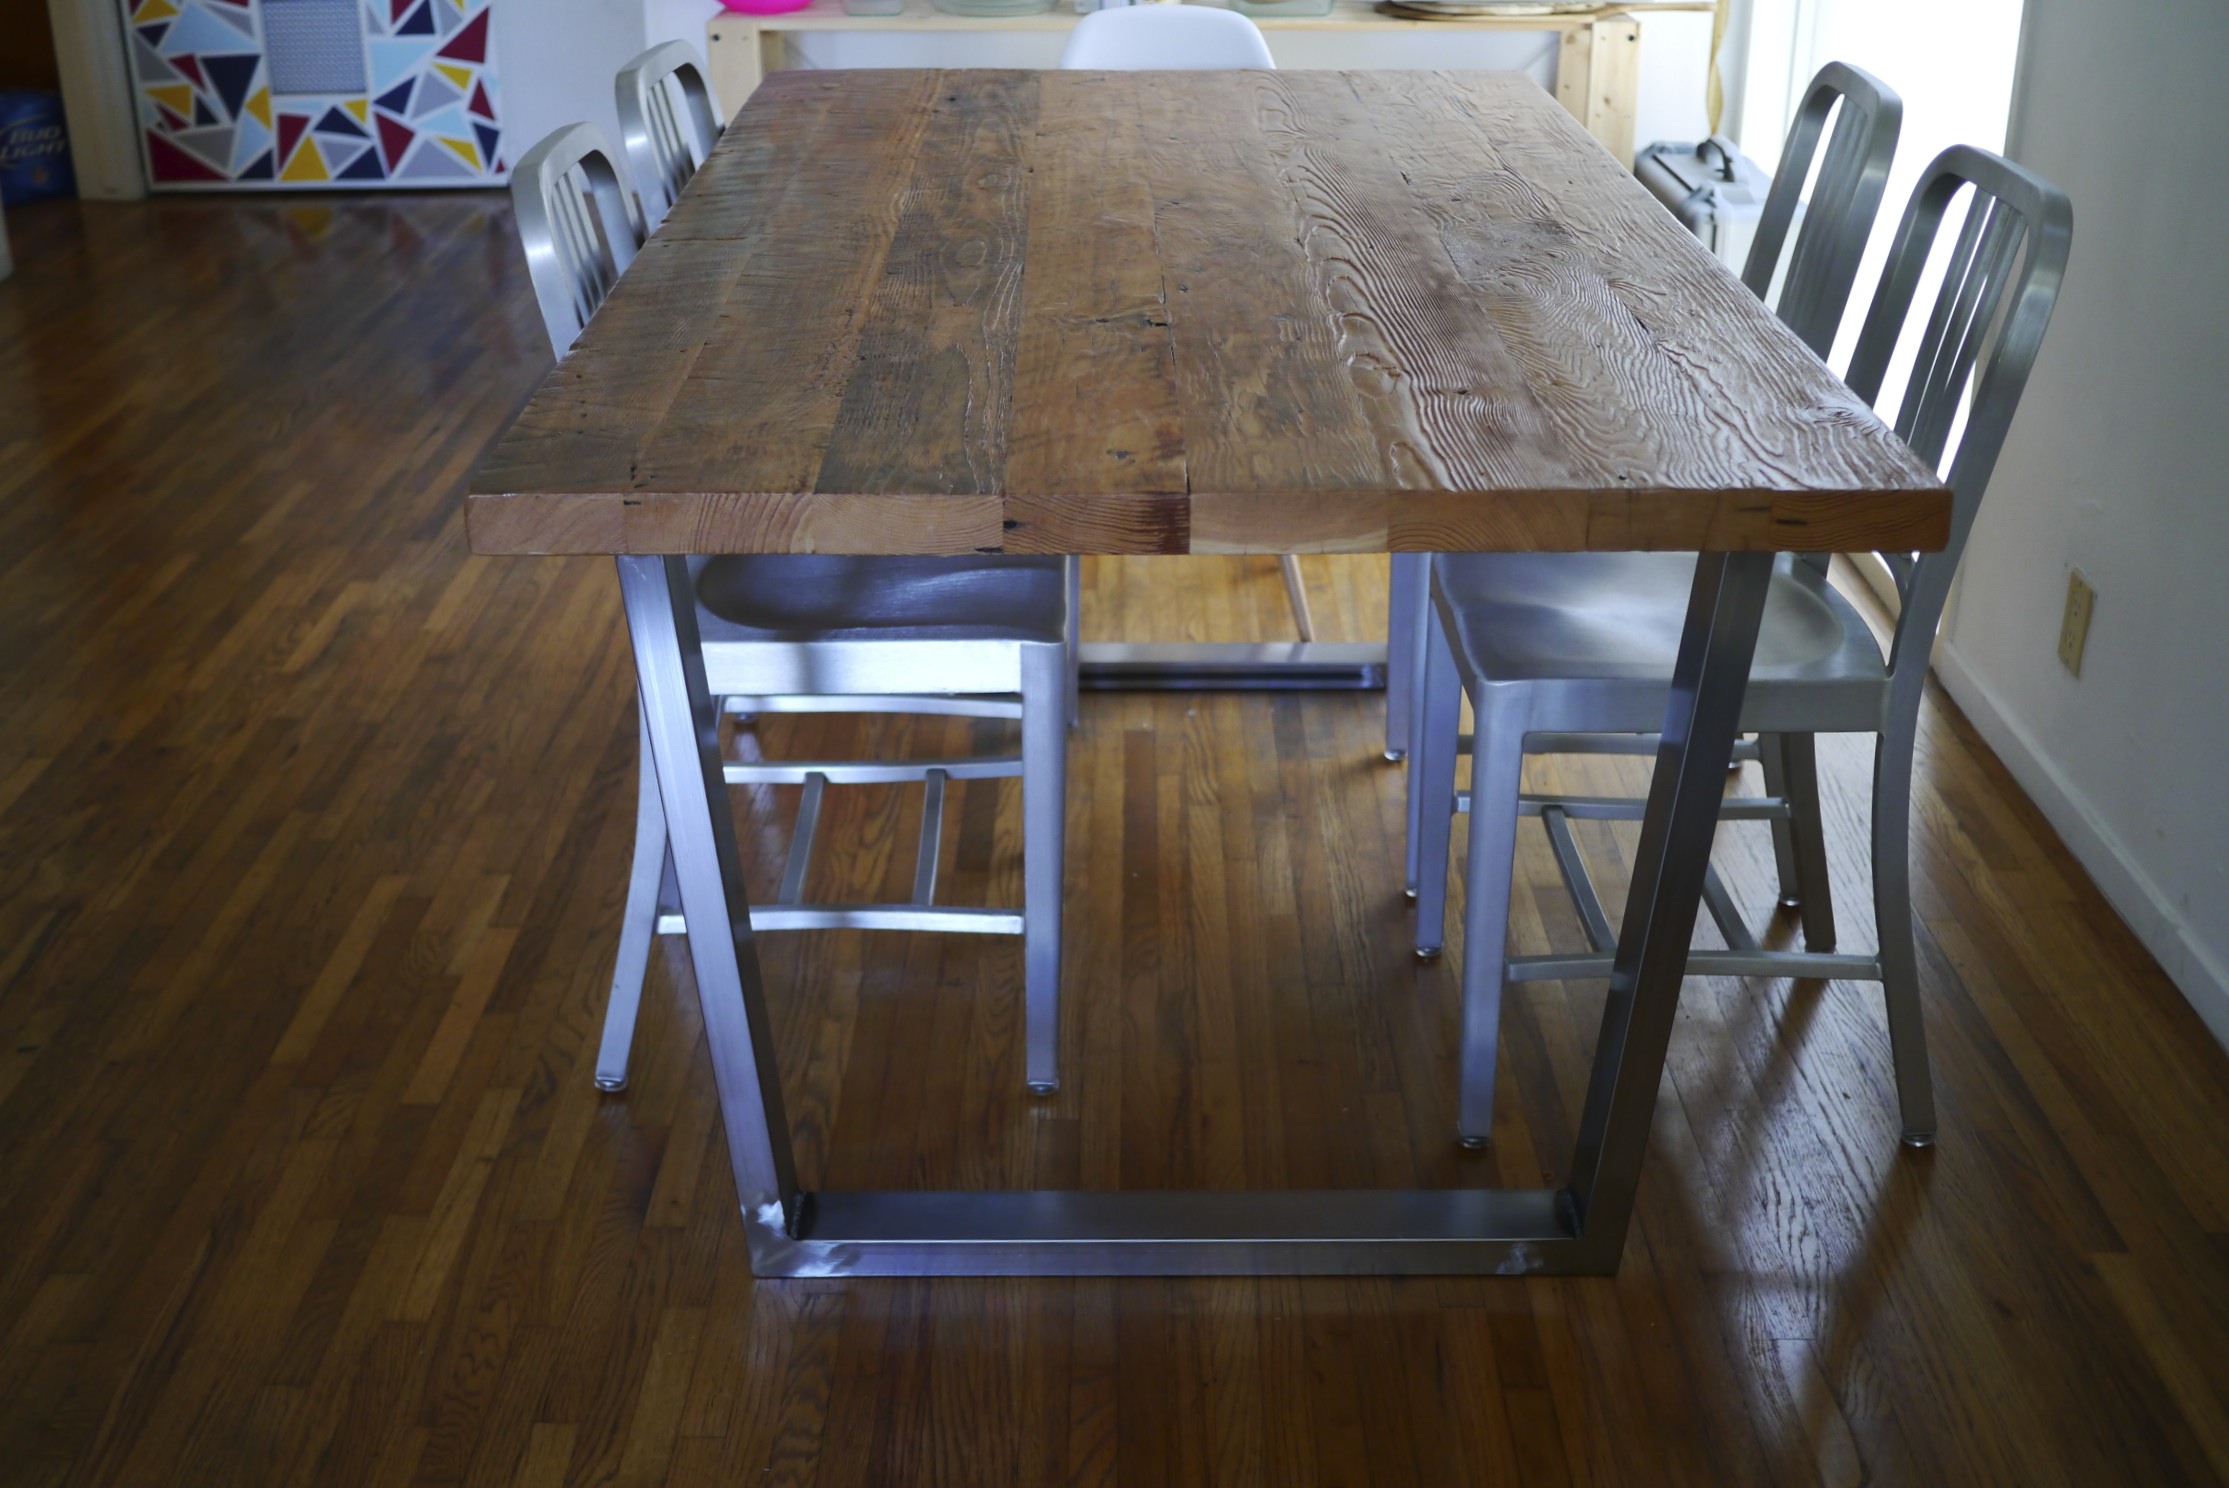

I need to put some felt pads under the legs to protect the floor, but other than that I’m going to call this one done.
Suppliers:
Wood table top: http://www.americanmaad.com/tables
