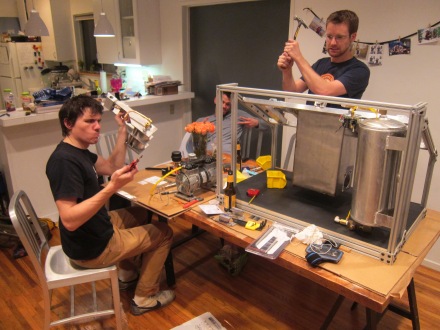
Things really started to come together this week. After spending a solid month machining, cutting, tapping, and welding parts and sub-assemblies, I began putting it all inside that empty 80/20 frame.
The air tank went in first. I am not completely happy with the mounting method, but it’s good enough for now, I’ll most likely make some bent brackets for it later on. The black board on the bottom is 1/2″ plywood laminated to a thin ABS sheet. It’s cheaper than solid plastic sheet and it gives it a finished look.
I started assembly of the pump body next. The pump body sits inside a tank of plastic material. It serves several functions. Cartridge heaters slide into the smaller 1″ OD x 0.25″ wall aluminum tubing, heating the entire weldment, and thus melting the plastic around it. The larger tube is the pump cylinder, inside that is a piston with a cup seal. When that piston is pulled back, it sucks molten plastic into the pump via the check valve (the cylindrical brass fitting). When the piston extends it forces molten plastic up the copper tube and into the valve body up top. It’s basically a 3″ aluminum syringe.
In the real mold-a-rama this is a one piece casting (it also doesn’t use the check valve). Since I don’t have access to an aluminum foundry, making it from plate and tube was the next best option.
I started with the base weldment and added the valve body on top and fittings on the side.
Next I bent up a piece of soft copper tubing. Side note: during manufacturing, drawing the copper to size work hardens it making it very hard, annealing it brings back it’s ductility (soft and bendy), if you accidentally buy hard copper you will not be bending it without splitting it open.
Also make sure you buy the correct size copper tube. Copper tubing is sold both in 3/8″ ID and 3/8″ OD sizes. The brass fittings are 3/8″ compression type and are meant for 3/8″ OD tubing.
I thought bending the tube was going to be really tough, as I have two distinct points I need to reach, so the copper needs to be bent within ~1/16″ the correct dims, otherwise it won’t sit correctly in the fittings. I made some careful measurements, bent in increments, and left myself some extra length on the ends to trim to size. Surprisingly I got it right on the first attempt.
Unfortunately the only picture I have of the completed pump body is in this awesome photo:
Up next to install:
- Plastic injection cylinder and mount
- Mold cylinders and mounts
- Compressor
- Chiller


