A few years ago I picked up a broken open box mini lathe from a local tool importer via Craigslist. It was advertised as an unbranded 7×12 digital mini lathe with only a picture and a brief description. I knew it would be the perfect addition for my home shop if I could get it working. It turned out to be a CJ0618B mini lathe, originally manufactured by Real Bull Machine. This lathe is relatively uncommon compared to the ubiquitous Seig C2, making it difficult to find information about it online. It seems to be extremely similar to the Seig C2, though with a lower build quality, fit, and finish.
While the slightly more common CJ0618A model comes with a version of the classic KB controller, the CJ0618B has a custom pulse width modulation (PWM) controller. This PWM controller appears to have closed loop spindle speed control, a feature rarely seen in these low-end mini lathes.
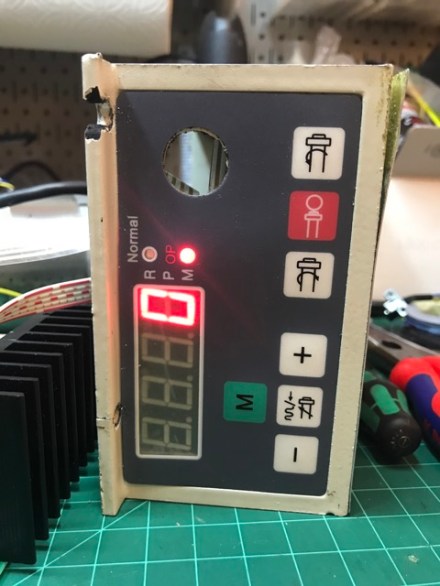
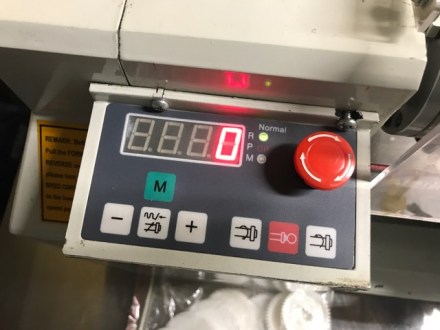
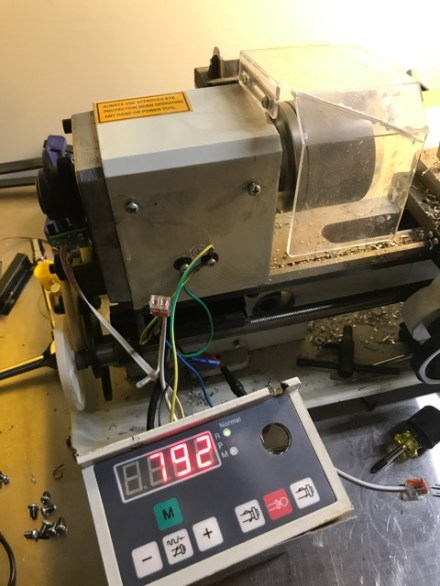
When functioning properly, pressing the start button on the lathe will power a display that indicates RPM, which can be adjusted with the keypad. The spindle motor would start after pressing the forward or reverse buttons. However, when you pressed the forward button on mine, the lathe would do nothing for a few seconds and then beep loudly and flash ‘A001″ on the display. Fortunately the lathe came with a small booklet that explains the operation and fault codes of this controller. This was rather lucky, as I could not find a pdf of this online despite using all my google-fu. I scanned a copy and put it up here:
https://www.docdroid.net/SDUalO1/special-instructions-for-cj0618b.pdf
According to the manual, “A001” is an underspeed error. This occurs when the controller is trying to start the motor, but is either seeing no spindle rotation, or a lower RPM than it was commanding. In my case it was the former.
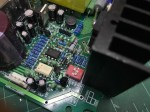
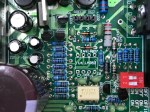
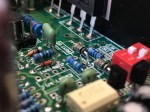
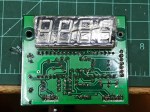
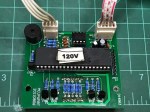
I took the controller off the lathe to look at the internals and found two printed circuit boards (PCBs): one appeared to be for logic and the other for power. The logic board was labeled MCUPWM8T and had a microcontroller (MCU), a few through hole components, an unmarked IC, and the 4 digit 7 segment LED display. It had three harnesses attached to it, one from the tachometer sensor, one for the buttons, and one going to the other board. The other larger board handles the mains power and performs the DC conversion and switching, labeled KPWT-600B. There were no obvious smoked or failed parts on either board, so identifying and fixing the failure would take a lot more digging.


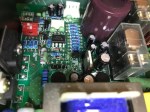
I took a look at the the overall layout of the power board to get sense of what was going on. Based on the components and their general location, I determined the following layout broken down by key functions:

Power Supply
Much of the board area is dedicated to converting 120 VAC into 5 VDC,12 VDC, and 107 VDC out. The 107 VDC line is created using a large bridge rectifier off mains power and a large filter capacitor. The relay coils are driven by a dedicated 12 VDC tap on the transformer and small rectifier. The 12 VDC of the logic ICs is created from a 18 VDC tap off the transformer. A 78L12 voltage regulator generates the 12 VDC line for the logic ICs. This regulator feeds a LM7805 regulator that powers the microcontroller. My guess for why they have both a 12 V tap on the transformer and a 12 V voltage regulator is so that they could use a smaller voltage regulator to feed only the logic ICs instead of the higher current relay coils.
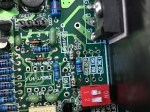
Motor Control Relays
The power board has two relays: one switches the positive and negative leads going to the motor to control spindle direction and the other is a braking relay. When the braking relay is activated, it disconnects the motor from the controller and shorts a 10 W resistor across the motor leads. This load causes the motor to rapidly brake, slowing it much faster than if you were to just disconnect power and let it freewheel. This is especially useful if you have a large piece of metal in the chuck, as the chuck stops almost instantaneously.
Power Switching
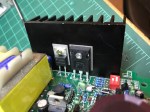
This circuit is the heart of the motor controller. Pulse width modulation (PWM) is a way to control the speed of a motor by sending short pulses of a constant voltage, rather than raising or lowering the voltage. This allows the motor run at a slow speed while still providing sufficient torque. This is a pretty simplistic explanation, go here if you want a more in-depth answer. The MOSFET is driven with a gate driver, a TLP250 from Toshiba. This IC both isolates the microcontroller from the high voltage MOSFET and switches the MOSFET with a higher voltage and current than the microcontroller could. There’s also a large diode mounted to the same heatsink as the MOSFET. This appears to be a fly back diode to protect the circuit from back EMF generated when the motor is powered off.
Overcurrent Protection
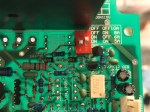
This board uses a LM358P dual op amp to implement the overcurrent protection functionality. One side is used as an amplifier to amplify the voltage measurement taken from a current sense resistor on the controller output. This voltage is very small (<0.5V), which is why the amplifier is necessary. This voltage is proportional to the current draw of the motor; the higher the current draw, the higher the voltage. The other side is used as a comparator to compare the amplified current sense voltage to a reference voltage. There’s a small set of DIP switches that allow you to set the max motor current before the overcurrent protection kicks in. The output from the comparator will either turn on the green “normal” LED and send Vcc to the gate driver IC, or will turn on the red “OP” LED and cut off Vcc to the gate drive IC.
Power Board Control
Fortunately the connector pinout between the logic and power board was labeled so I could pretty easily see how the logic board controls the power board.

The power board supplies 5 VDC and ground to the logic board. The logic board returns a PWM signal and two relay control lines. The logic board also reads the input from the optical sensor mounted to the spindle and converts it to RPM. Since the spindle was not rotating, possible failure modes include
- Logic board not outputting the PWM signal
- Power board not switching MOSFET based on the PWM signal
- MOSFET is switching, but isn’t receiving voltage from power supply
- MOSFET is switching, but voltage is not making it to motor
Measuring a PWM signal is pretty easy if you have an oscilloscope. I didn’t have one, so I connected the output to an Arduino and wrote a simple sketch to confirm that is was outputting a PWM signal. I later realized that my multimeter, a Fluke 177, has the ability to measure a simple frequency signal like this.
I inspected the RPM sensor mounted to the spindle and found a broken trace on the PCB, which I fixed with some 30 AWG wire. The tachometer sensor is an optical slot switch and was marked as WYC H12A5. I measured the output and found it to be very weak, outputting <1 V when unblocked. I replaced the switch with a Sharp GP1S53VJ000F optical switch.

While these sensor problems might have been problematic later on, they weren’t the cause of my issue, as the motor wasn’t even attempting to rotate. It seems like the microcontroller will wait for 4 to 5 seconds before throwing the error code. If your lathe turns on, but doesn’t indicate an RPM on the display, and shuts off after a few seconds I would check the output of this sensor at the logic board.
Since the PWM signal was being generated correctly, I decided to check for proper voltages around the board. I found the data sheets for the IC’s and located the Vcc pins for each. I measured around 8 VDC at the gate driver, but the data sheet specified a minimum of 10 VDC. I traced it back to a bad 12VDC regulator and shot off an order to Digikey. A few days later I replaced the failed regulator and powered the controller on.
The input at the logic ICs was now a steady 12 V! My joy was short lived as the controller still gave me the A001 error. However now the red overcurrent protection (OP) LED was on. What was odd was that the LED turned on the moment the controller was powered on. This behavior made me suspect there was something wrong with the circuitry that activates the OP LED, because the light was turning on with no current having gone through the motor.
I traced more of the circuit and found that the op amp output controls power to the LEDs as well as switching power to the gate driver IC. This ensures that the motor stops when the overcurrent protection is activated. I used a digital multimeter to measure the pins of the op amp and found the voltage comparator section of it was not working correctly. The non-inverting input was larger than the inverting input, so the output should have been high, but was reading low. This was causing the overcurrent protection to be activated. Another order to Digikey and I had a new TI LM358P op amp.
When the controller turned on I was greeted with a green LED and no red OP LED! I tried once more to fire up the motor, but alas A001 was staring back at me again.
At this point I started diving deeper into the board to create a schematic of the entire circuit. Despite only being a single layer PCB, this proved difficult because the components are packed very tightly and there are many traces that weren’t visible unless the components were desoldered. A few days of on and off troubleshooting and I began to suspect the gate driver. All the other components between the output of the gate driver and the MOSFET gate seemed fine, but there was never any voltage on the gate pin when the controller was attempting to start up the motor.
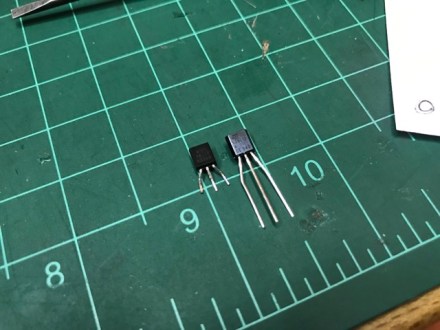
The original IC, Toshiba TLP250, has since been discontinued. You can still get them on eBay from China, but I didn’t really want to wait that long. After a little bit of research I found Toshiba had a new gate driver IC, TLP351, that is pin compatible. Another Digikey order later and I had a replacement IC. At this point I wasn’t expecting much given the history of debugging this PCBA, but when I turned on the controller, the motor sprang to life! It was quite a thrill after several weeks of working on this.
I began to play with the motor and speed settings and noticed a weird issue. I wasn’t able to get the rotation direction to reverse. On a lathe sometimes you want the spindle to turn one way or the other, depending on which side of the part your cutting tools is. On this controller if you press reverse while the motor is spinning, it is supposed to ramp down in speed, stop, and the ramp back up in the opposite direction. On mine it would ramp down, stop, and then ramp up in the same direction.
I also noticed the direction control relay would close when the controller was turned on, but would never open when it should have. The same was true of the brake relay, the motor coasted to a stop, instead of being shorted to the braking resistor.
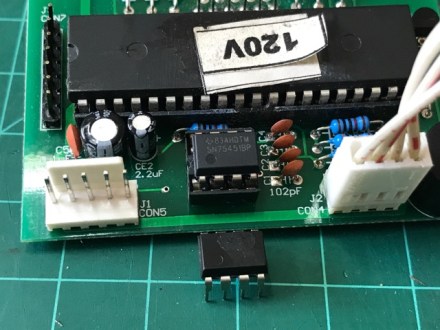
I started to dig back into the power and logic board to see how the relays were controlled. I checked for 12 VDC on one side of the coil and found it on both relays. Tracing back the path to ground it seems the relays are grounded at the logic board. Taking a closer look at the logic board, I found a 8 pin DIP IC with its part number marking intentionally removed, which made investigating this IC challenging. This device was the interface between the microcontroller output pins and the relay coils path to ground. I traced back all the pins and came up with the below schematic:

Using the schematic, it’s evident that this is an IC that controls two 12 VDC relay coils by switching them to ground, runs on 5 VDC, and takes a logic level input from a microcontroller. I also noticed that the input from the microcontroller went to two pins each. I thought this might be some kind of Darlington array transistor, but the pinout didn’t match anything that I could find. Searching around online I stumbled across a list of logic ICs and sorted them by pin count until one caught my eye: a dual 2-input NAND 30 V / 250 mA relay driver. Based on the data sheet, the pinout didn’t match exactly, but it was close.

A little more searching and I found it’s not uncommon to use logic gates (AND, NAND, OR gates) to allow a microcontroller to switch a high current load, like a relay or light. Eventually I came across a NAND gate that matched the pin out: TI SN75451BP Dual Peripheral Driver.
One last order to Digikey and I had a fully functional lathe controller!
Total parts replaced:
- 78L12 12VDC voltage regulator
- TI LM358P dual op amp
- Toshiba TLP250 gate driver
- TI SN75451BP NAND Gate
- Optical slot switch
Given all of these failed components are ICs, I would guess that some kind of voltage spike or power surge occurred and blew all these components simultaneously.
This repair tested the limits of my board troubleshooting and repair abilities. It was frustrating at times to find and fix issues only to reveal more issues, but I am glad I stuck with it as I now have a fully functionally lathe.
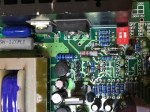
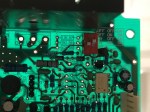
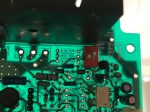
Here are some more photos of the PCBs, some with the components removed so you can see the traces better.