
Last winter I saved an ice cream maker from going to the land fill.
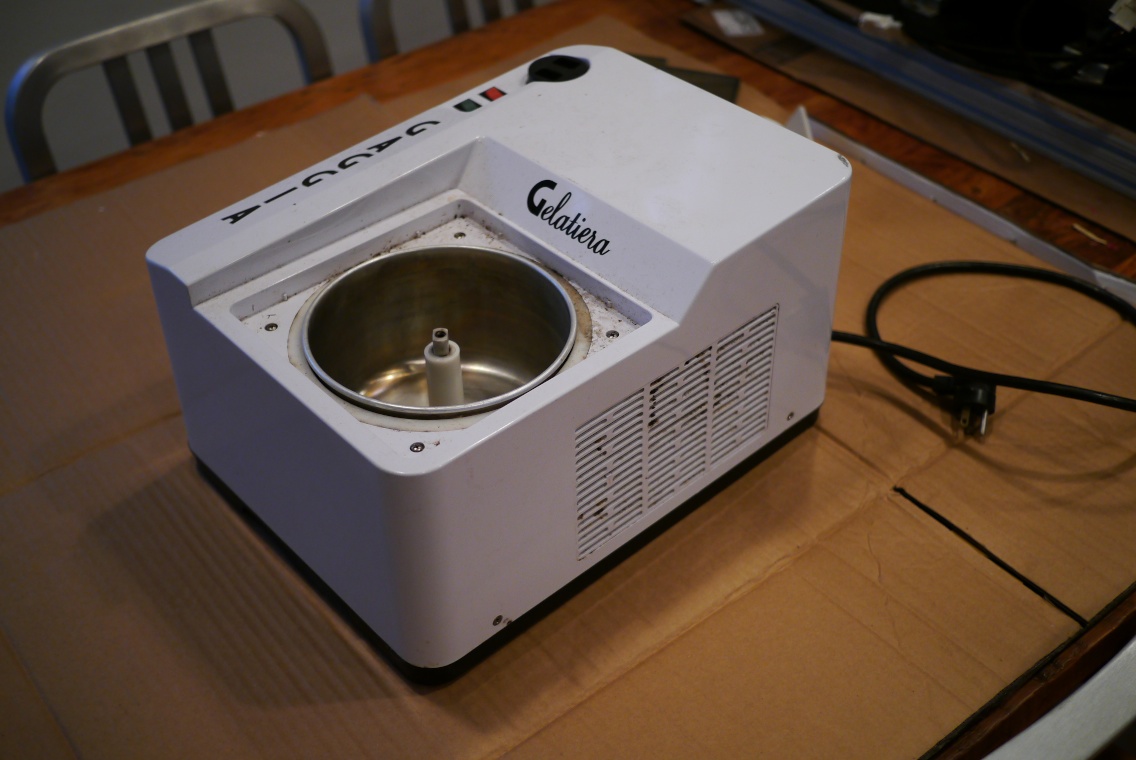
This is a Gaggia Gelatiera ice cream maker from the early 80’s. While small in size, it’s a very heavy italian made machine. It’s significant weight (nearly 50lbs) is due to the built-in refrigeration system. In most ice cream makers you need to either pre-freeze a water lined bowl, or use rock salt and ice to cool the ice cream mixture. This machine uses a compressor, condenser, evaporator, and refrigerant to constantly cool the bowl. The advantage being that it is always ready to make batch after batch of ice cream.
After turning it on I soon realized why it was headed for the dump. While the bowl would cool down fine, the mechanism turning the dasher made a horrible grinding noise and wouldn’t turn. While I’m not a huge consumer of ice cream, I do enjoy a good repair challenge!
The machine was remarkably easy to take apart. About 8 Philips head screws and the top cover came off.
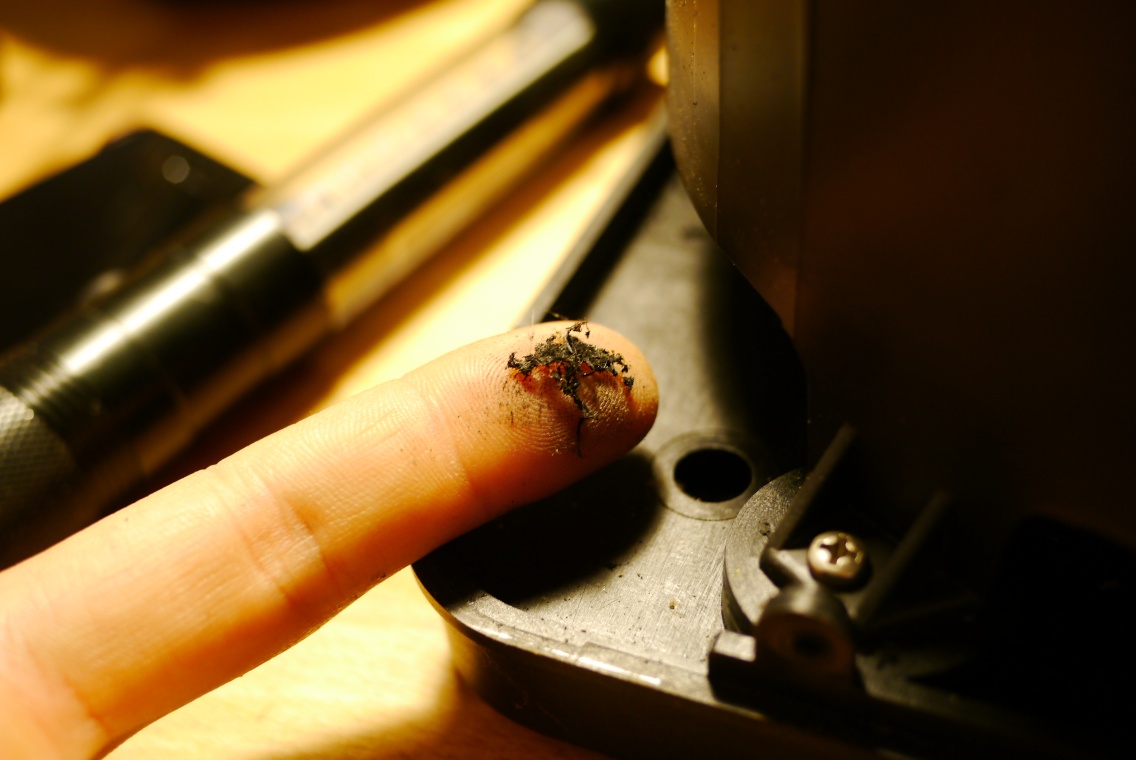
With the cover off, the first sign of trouble appeared: a fine black powder spread around the base.
The dasher drive motor looked okay and spun freely so it seemed the problem was coming from deeper in the machine.
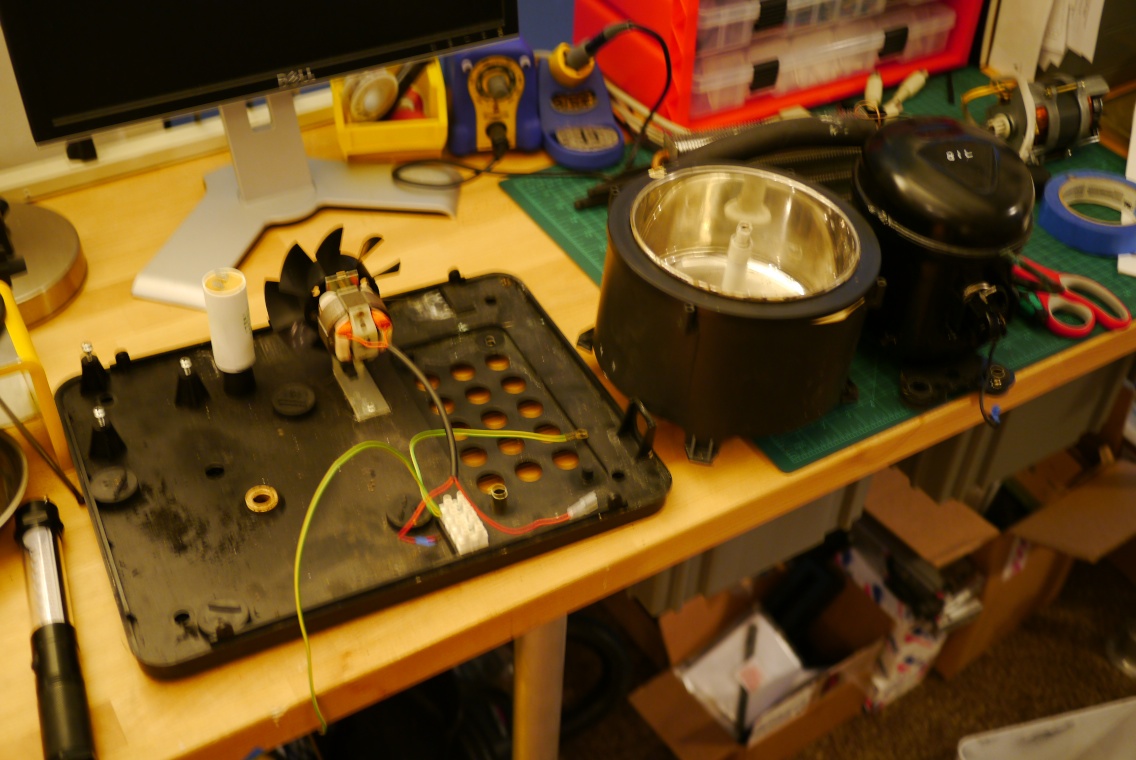
Getting to the innards required removing pretty much every component from the base. To make it easier to remove all the components I disconnected all the wiring, but not before making a quick diagram.

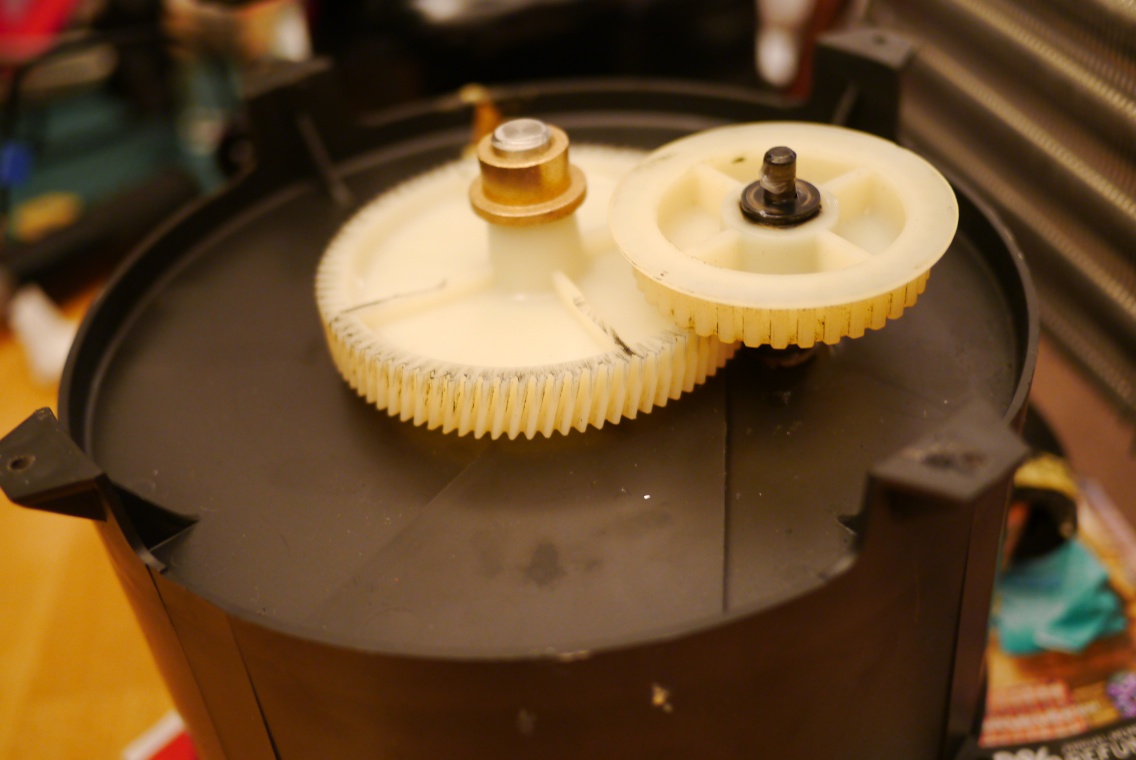
With the base removed, the source of the grinding noise was pretty apparent.

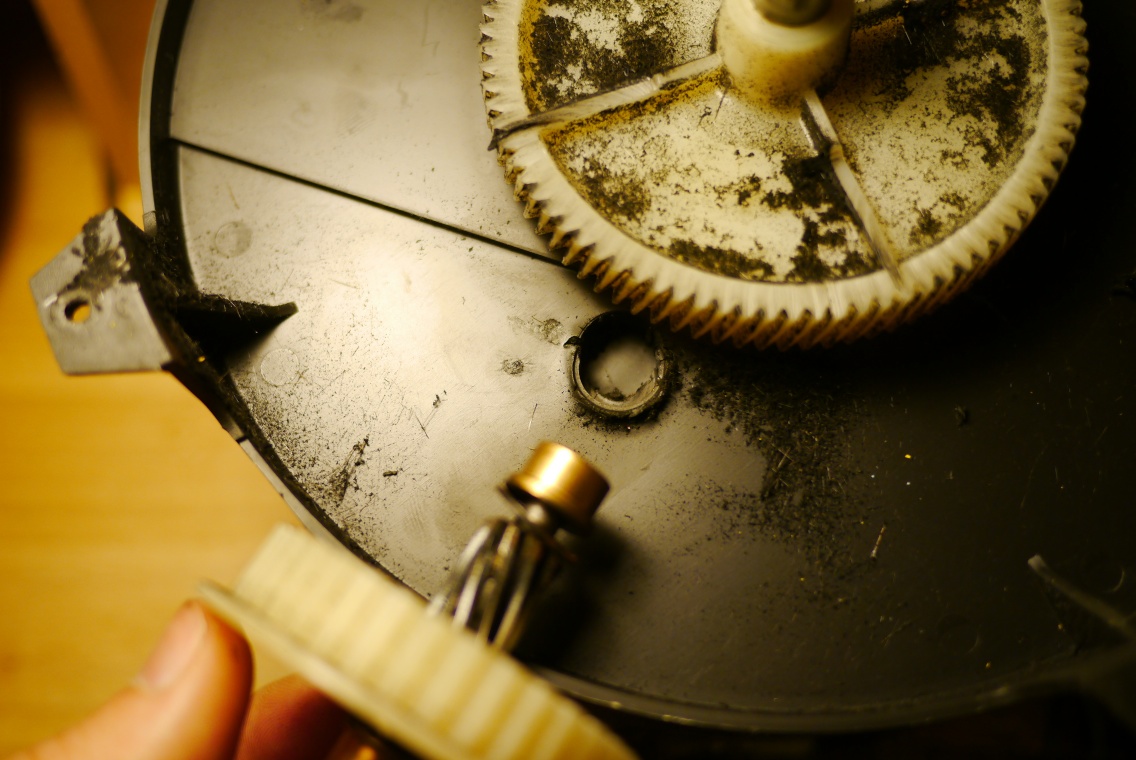
One of the bushings on the intermediate shaft had seized and began spinning in its bore. The bore, being made of plastic, was worn into an oblong shape. This caused the intermediate shaft to become misaligned, which caused two problems. First the small metal helical gear was no longer meshing correctly with the large plastic main gear, which is why the dasher wouldn’t turn. Second, the tilted intermediate shaft caused the timing belt to rub against the main gear. You can see in the above picture where the belt cut into the gear and deposited bits of belt all over the inside case.

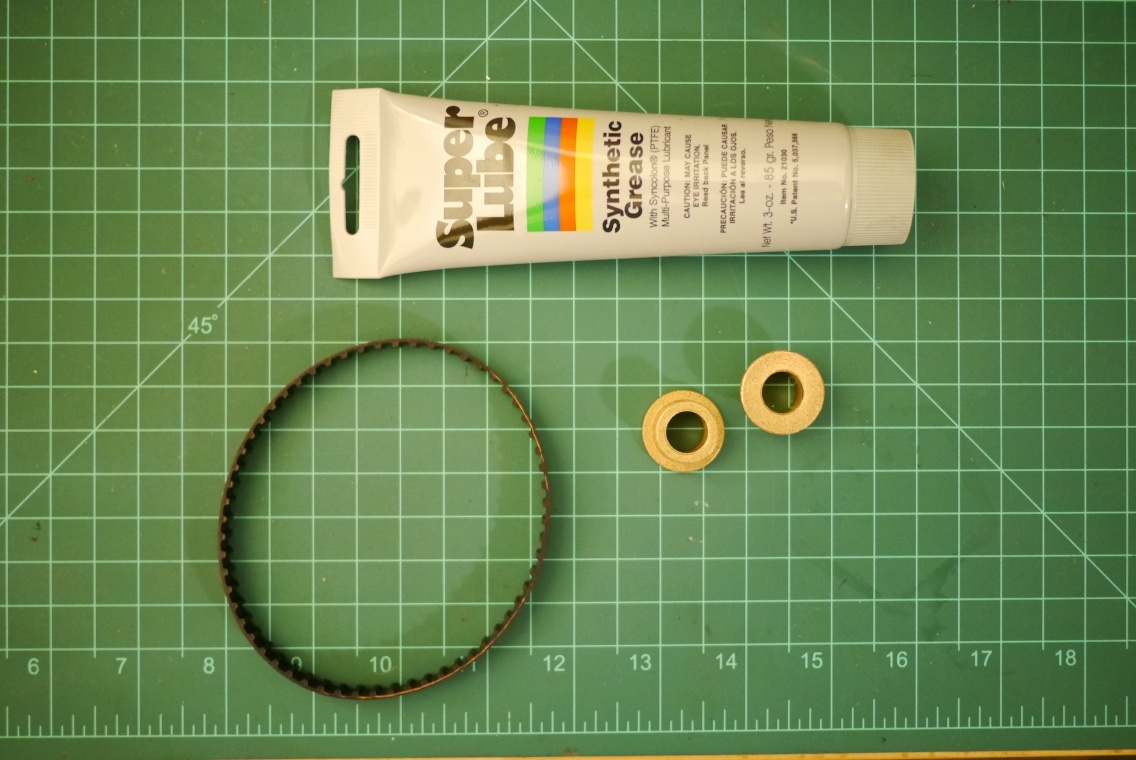
The new drive belt is on the right, the old one on the left. The belt wore about 1/8″ of its width off.
I ordered new parts from my favorite industrial supplier, McMaster-Carr. New bearings for the dasher drive shaft,120XL037 size timing belt , and food safe grease. I couldn’t find new bushing for the intermediate shaft as they were not a standard size. I inspected the old bushings closely and there wasn’t much wear.
Using an x-acto knife I cleared out all the bits of melted plastic from the bushing bore. Fortunately there was enough of the original bore that I could get the bushing back to its original position by pushing it against the undamaged side of the bore. The damaged section was filled with 3M DP810NS, a high viscosity two-part epoxy.


The black plastic cylinder is the evaporator/bowl unit, which is connected via copper pipes to the compressor and condenser. This made for an unwieldy re-assembly. The copper pipes connecting all the parts are very small, if they become kinked they could leak, or restrict the flow of refrigerant. I found it was easier to assemble the gear train upside down and place the base on top of it.
WIth everything back together the machine was much quieter and the dasher spun properly.
No previous post-repair testing has been this delicious (vanilla custard if you’re wondering).


Thank you for this post! It enabled me to repair a machine I acquired at the “gift shop” at our landfill. It was in working order and ran fine for a couple of years but broke a timing belt recently. I love the ability to keep old equipment running rather than replacing it.
I have just taken the cover off my mother’s old machine which looks about the same as yours. She has had it since the 80s I think. There is a yellow sticker with:MOD. 3MG 2-35-30/100 inside. It cools but the paddle does not turn. The paddle turns if you turn the cooling blades of the motor. So I am about so embark on a similar journey to yours. I cant see any black power and the belt looks OK, not black but brown/orange with 120 written on it. I’ll let you know how I get on. I too do not like throwing stuff away.
Great post, I just put my machine back together after taking it apart for a thorough clean. It’s much easier to clean the air inlet/outlet vents with the top off the machine.
It was all working fine, after about 5 years of ownership and weekly or twice weekly use so I didn’t go any further than a quick look around and a bit of dusting.
However I wish I’d looked your posting up first as I would have a better idea of where to look for signs of mechanical wear. Still I’m a jump first look later home repairer and enjoy DIY repairs to anything I can crack open.
I will be bookmarking your page for future reference. Keep up the great work.
Where to order parts for the Gaggia ice cream maker?
You are good!!